
Here in this blog, you will know how to hide affiliate links with ThirstyAffiliates. With affiliates, we could monetize our blog, so it is important to know how to add affiliate links to WordPress.
What you would learn?
- What is ThirstyAffiliate
- How to install Thirsty Affiliate in WordPress
- How to cloak affiliate links using the Thirsty affiliate plugin (How to add affiliate links to WordPress)
What is Link Cloaking?
Link cloaking is a technique by which you can mask or hide your lengthy affiliate links and make them shorter and branded with your website’s name embedded.
So, let’s start learning!!
What is ThirstyAffiliate?
Thirsty Affiliate is a WordPress tool/plugin to manage your affiliate links.
With this tool, you can easily add affiliate links to WordPress.
It allows you to mask the original affiliate link/URLs by cloaking them.
Let me explain through some examples.
Example:
The URL before Cloaking /Masking –
Before cloaking the URL, it looks as below.
https://www.affiliatesite.com/productsname/??productid=1066588&p=15432&m=789
The URL after Cloaking (through the ThirstyAffiliate )-
Suppose you cloak the above long URL via using the ThirstyAffiliate plug-in, it would look as below.
https://mssaro.com/productname
What a nice & clean the above 2nd URL, also it represents my brand Massaro.
The second one is short and easy to remember with your website’s name.
Refer to our blog if you want to check more detail about Link Cloaking.

You will see how we are cloaking the link in a couple of minutes.
How to Install ThirstyAffiliate in WordPress
Step 1: Go to the ThirstyAffiliate site and click the plan you want.
ThirstyAffiliate has three plans- ADVANCED, PLUS, and BASIC
All the features are the same in these plans only one difference, i.e., the number of sites it can be used.
If you take the Thirsty Affiliate ADVANCED plan, you can use it for 10 sites. Similarly, PLUS and BASIC are for 5 sites and 1 site, respectively.
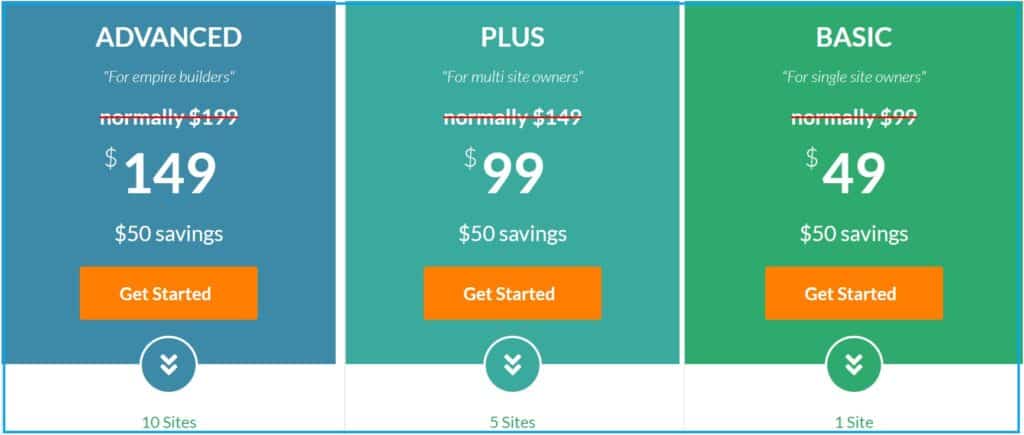
Based on your requirement you could choose the plan. You would get a 1-year subscription to thirsty affiliates by filling in the below details.
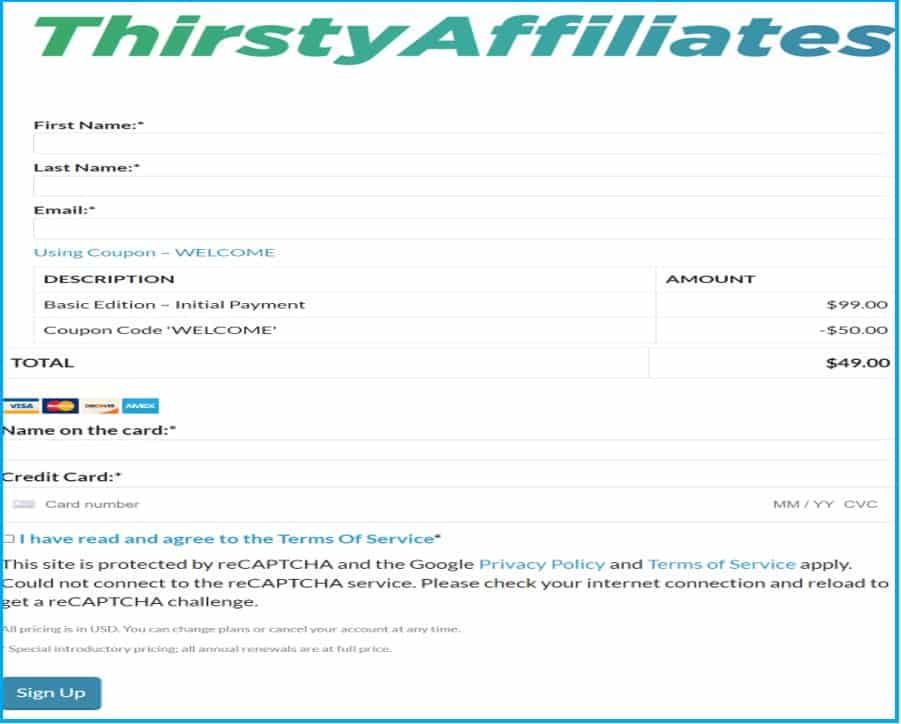
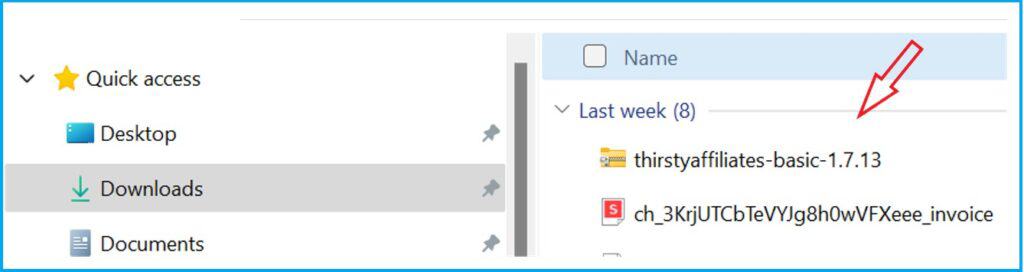
Once you purchase the thirsty affiliate plugins, you must install and activate them. The Thirsty Affiliate zip file would be at your email id, click and download it.
After purchasing this, you would get a zip file of the Thirsty Affiliate plug-in.
Step 2: Add Thirsty Affiliate Plug-in in WordPress
Go to your WordPress Dashboard —–>Plugins ——> Add new ——> Upload Plugin
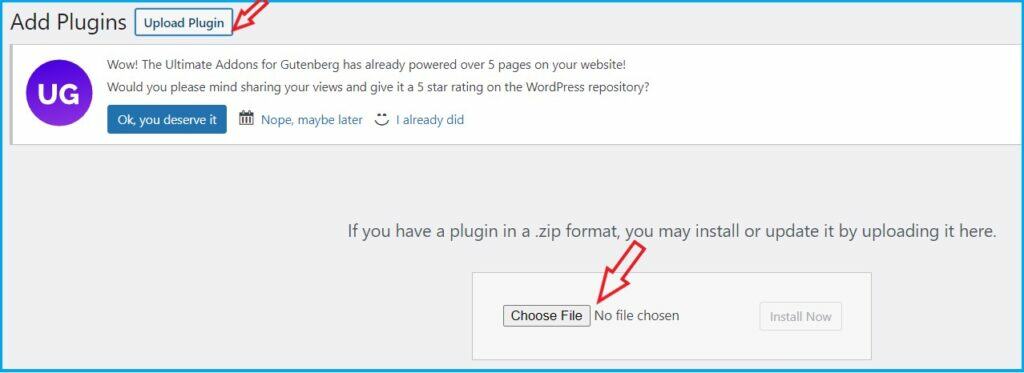
Choose the thirsty affiliate file from your downloads and install & activate it.
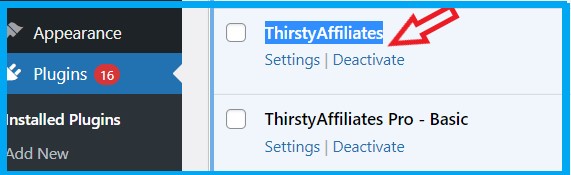
After installation, in your WordPress Dashboard, you will see that the Thirsty Affiliates plugin has been activated, as shown in the screenshot below. You can deactivate it anytime if you want, but it would rarely happen.
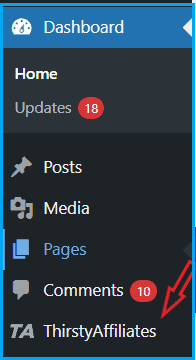
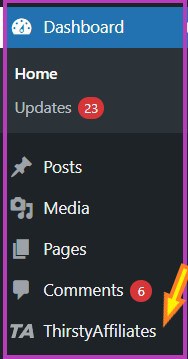
Once you installed the ThirstyAffiliate. It would appear on the left side of your Word Press dashboard, as shown below.
How to cloak affiliate links in WordPress with ThirstyAffiliate
We have taken this topic because affiliates are one of the best ways to monetize your blog.
So, if you do it correctly, you will earn more. Link clocking is essential and could be done quickly with the help of Thirsty affiliate plugins.
So, let’s jump to how to add affiliate links in WordPress.
If you want to watch a video instead of reading the blog you can watch this here.
I would explain it with a dummy WordPress Blog and affiliate link. So, stay glued!!
Steps -How to add Affiliate Links to WordPress with ThirstyAffiliate
After installing Thirsty Affiliate, you will see the icon of ThirstyAffiliate at the left corner of your Dashboard.
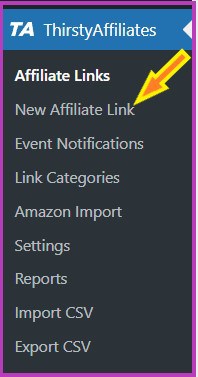
Step 1: Click on ThirstyAffiliate and then the New Affiliate link
You will see the following options.
Step 2: Add a suitable title

It must be the product name you want to recommend.
Suppose we want to recommend Bluehost to our readers.
At Add title option, we would write Bluehost.
Step 3: Add Destination URL (Add Actual URL)
We would write the original affiliate link, which we have got from Bluehost directly or from various affiliate network sites like ShareASale and Commission Junction.
Here just to explain, I have taken the Bluehost URL as the affiliate link;
Note: It’s not an actual Bluehost affiliate link, but you would know how you could place your affiliate link with this.
Suppose, in this case; the original affiliate URL would be
https://www.bluehost.com/
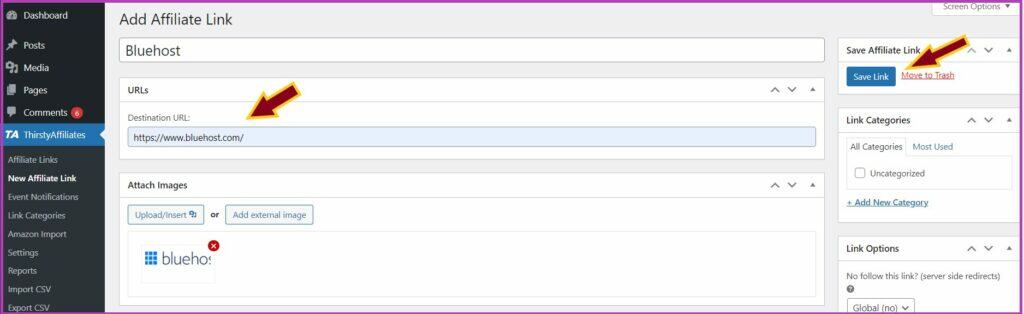
I have inserted the Bluehost image, though it is not mandatory.
Step 4: Save the Affiliate Link
Then Save the Link (right corner). By saving the link, you could see your cloaked URLs in the Affiliate Links option of ThirstyAffiliates.
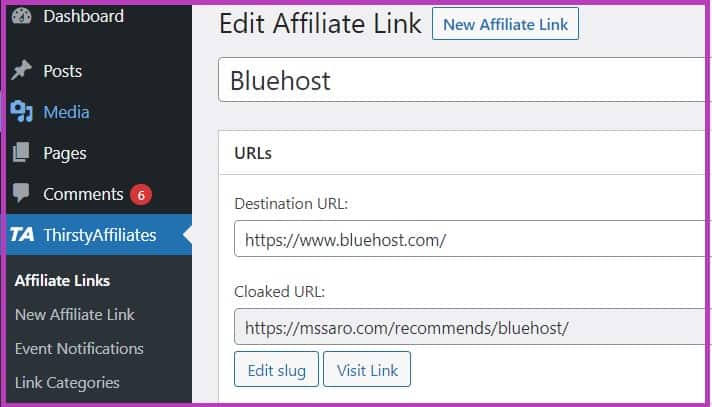
Finally, we cloaked the Affiliate URL in a simpler one.
Destination URL: It should be your Affiliate URL from a product company like Bluehost or other affiliate network sites like ShareASale, Commission Junction, etc.
https://www.bluehost.com/
Cloaked URL: It is simple, clear, and represents your brand.
https://mssaro.com/recommends/bluehost
Note 1: Bluehost word in the above URL is that which we are setting in the title in Step 2.
Note 2: In a minute, you will see from where we are getting recommend words in the above URL
Let’s move to next…
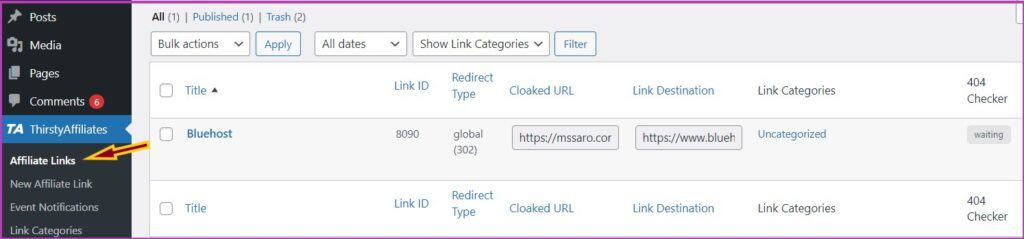
By opening the option Affiliate Links in ThirstyAffiliate, you could see all your affiliate link details like
- Link ID,
- Cloaked URL,
- Link Destination,
- Link Categories, etc.
We generally do not put a link category option as it would lengthen your cloaked URLs.
There is an option of link categories by which you can sort your post, and they easily go with your affiliate links. You can add a Link Category though it is not necessary step.
The added category would come in your affiliate URLs after the link prefix and before the link slug.
It would increase the length of your affiliate link/URL. By adding a category, your affiliate link would look something like this-
http://www.(your website name).com/recommends/category/link-name.
Note: As it is not mandatory to add a category, you can skip this option as it would increase the length of your URL.
You can see your saved links/URLs by going to the Affiliate Links option under Thirsty Affiliates.
Step 5: Go to the Thirsty affiliate setting and Link Appearance options.
The link appearance option is the appearance of your affiliate links.
Then go to Link Prefix.
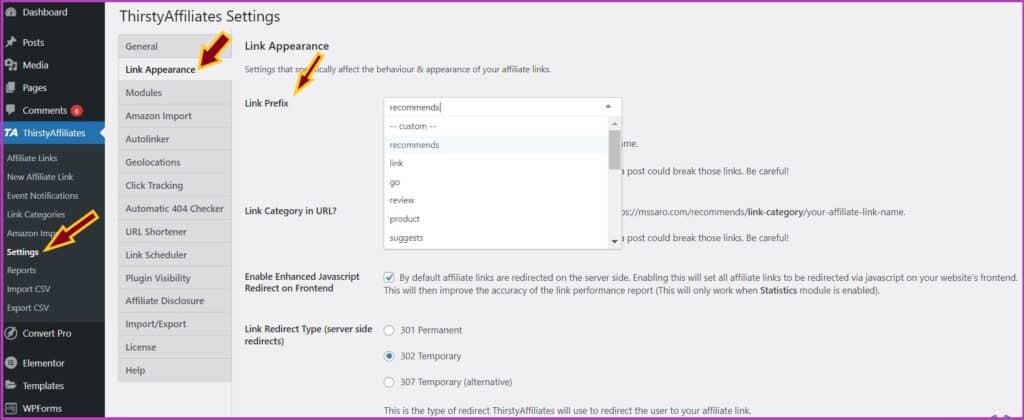
Choose any option from the drop box as shown in the screenshot below; whichever option you choose will be added to your clocked link.
I selected the recommended option.
Then Save Changes (option at the bottom of the concern page)
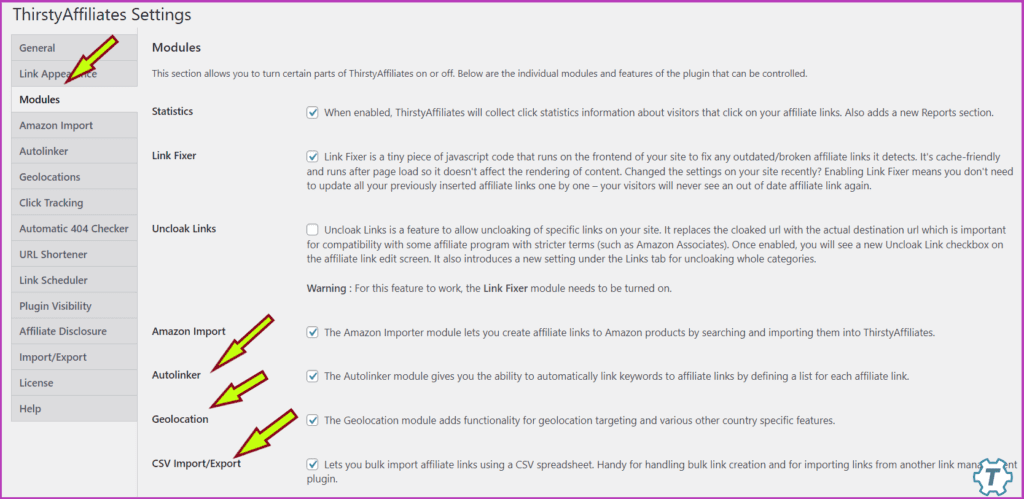
Step 6: Some important Configurations in Thirsty Affiliate
Then go to Thirsty affiliates—>Settings—>Modules
You will see many options like Auto link keyword, Geolocations URL, CSV import/Export.
You have to enable all these options.
Let’s know each of them one by one…
Auto-linker Feature in Thirsty Affiliate
Auto Link Keyword– This feature is available in ThirstyAffiliates Pro.
Auto Link lets you set keywords and automatically link them with your affiliate links.
You have to enable this feature ThirstyAffilaite–>Settings—>Modules.
Geolocation feature in Thirsty Affiliate
Geolocation– This feature is available in ThirstyAffiliates Pro.
Geolocation targets various other countries’ users. Suppose, when a reader comes to your website and clicks on an affiliate link, then using the Geolocation feature, you can easily redirect your users from different GEO-based locations to the correct affiliate links.
At Geolocations, you would see three MaxMind options.
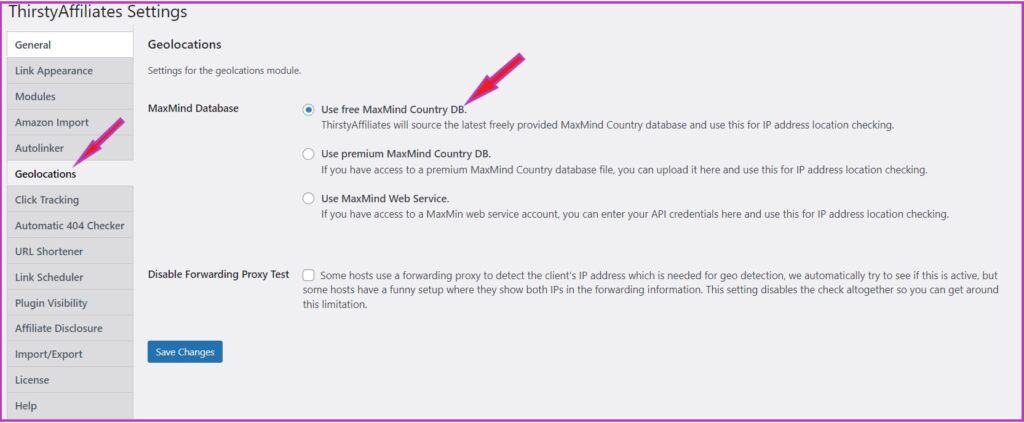
Note: Use free MaxMind Country DB – You have to tick this option as we often use free Maxmind Country DB.
After setting the Geolocation option, simply go to New Affiliate Link—>Scroll down to Geolaction URLs. Choose the country and paste the destination URL.
You can add many Geolocation URLs by Add Geolink.

The geolocation feature is very essential as you can redirect your readers to country-specific affiliate link URLs.
CSV Import & Export feature in Thirsty Affiliate
CSV Import/Export– By this feature, you can easily bulk import/export affiliate links in a CSV spreadsheet, which is very handy for handling bulk link creation.
At ThirstyAffilaites —>New Affiliate Link, when you scroll down the page, you will see some more options. As per your requirement, you can select from the options.
Select the link inserted scanner; it would scan all your blogs.
Wherever the particular link is available in your blog, it will also update it without hassle.
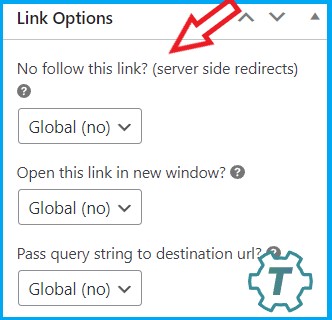
On the same page right side, you would see no follow option and open this link in a new window; you must check these options so that Google doesn’t crawl on these links. This could be done from the settings option too.
Step 7: Add an Affiliate link to your Blog post
Go to the Blog post in your WordPress dashboard where you want to add an affiliate link.
Here my dummy blog is about Bluehost, and I want to add a Bluehost affiliate link (which is also a dummy link in our case).
Suppose at text/word Bluehost I want to add an affiliate link.
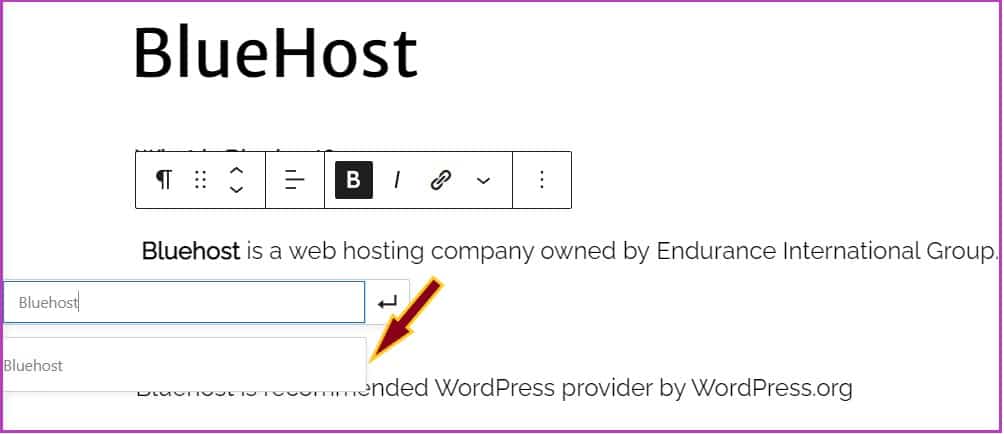
Put your cursor over Bluehost text and select this, where you want to place an affiliate link.
You would see that a horizontal box will open, go to the link option, and click Thirsty Affiliate from the drop box.
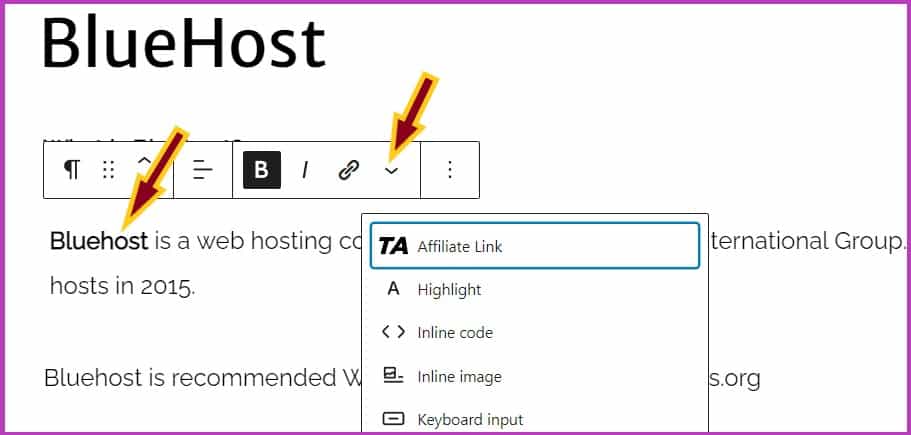
By clicking Thirsty affiliate, you would see an option to paste a URL or type to search.

By writing Bluehost, it would automatically appear in the search. Here you have to paste the URL, or you can simply search as we have already saved the Bluehost URL.
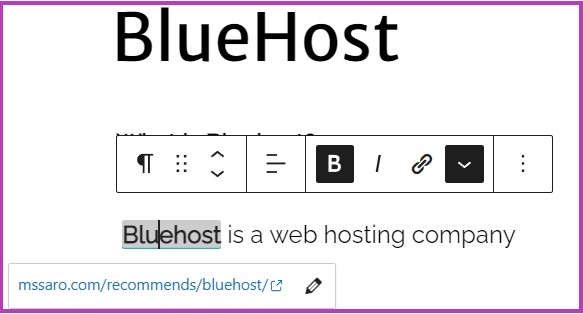
Step 8: Click on Bluehost and Enter.
By this, you could see that the cloaked link has been placed on your blog with your website name embedded. Here it has been cloaked as
https://mssaro.com/recommends/bluehost/
Conclusion
Thirsty affiliate is an affiliate link management plugin by which you can easily cloak your affiliate links in a shorter, branded one.
I hope you have good learning!!
Still, feel free to ask us in our comment sections if you are stuck somewhere. We would be happy to answer all your queries related to the blog.
Keep Smiling, and Start Sharing!!
Frequently Asked Questions (FAQ) on How to Hide Affiliate Links with ThirstyAffiliate
Answer-Yes. It’s better to cloak affiliate links and make them shortened and branded, including your website name.
Answer-Yes.
Answer-Yes, except for Amazon affiliates.
Answer- 301 is a permanent redirect HTTP code for changing permalink structure.
Answer- 302 is a temporary redirect, stating that content is at the new redirected URLs.
Answer- 307 is also a temporary redirect and an improved version of the 302 redirects