Something went wrong with your WordPress website, and the website is not running, and as a result, downtime of the website is increasing, so it would create an awful impression on our users who are associated with our blogs.
So what we can do to make it run immediately.
In this blog, we are going to look that how to fix this problem quickly.
Note: Whatever the steps I explain here, please use those in some staging websites before production.
What we would learn from this blog.
- Step 1 : Take a Backup of Folder and Files
- Step 2 : Restore the public_html folder
- Step 3 : Verify the permission on the new public_html folder
- Step 4 : Import the Database file
- Step 5 : Test our WordPress website.
So let’s start.
Step 1 : Take a Backup of the Folder and Files
As responsible website owners, we should be in the habit of taking backup regularly.
In this, we first need to understand 2 things
- What are the necessary folders, files, and database files to take backup?
- How to take backup manually for such files?
To know about the above 2 points, please hold for a moment and read first How to take Manual backup of WordPress website. After reading this, please take a backup of important folders and files.
Step 2 : Restore the public_html folder
Now we have taken the backup of all the required files/folders in Step 1; now, we would use such backup files to make running our stopped website.
Assuming you have a backup of 2 things (to know in detail, please read How to take Manual backup of WordPress website.)
- public_html folder backup (from our hosting account server/system)
- databse’s sql file backup (from our hosting account server/system)
Now we would first restore the public_html file.
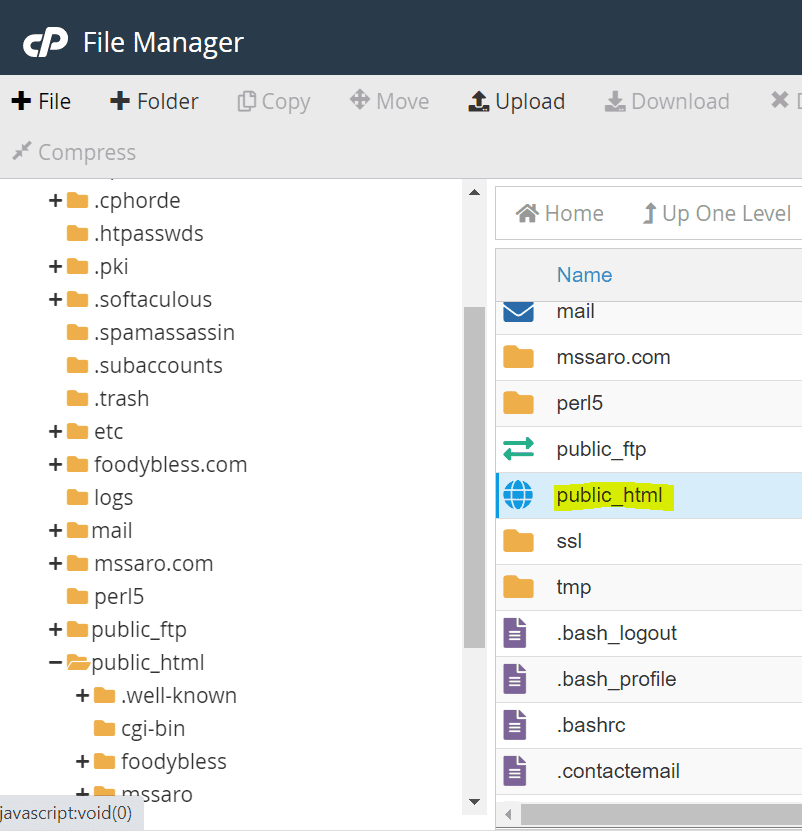
We know that the public_html folder is one main folder with all the things related to our running website.
Log in to your web hosting account and open the File Manager Interface. We can see the public_html folder here as below.
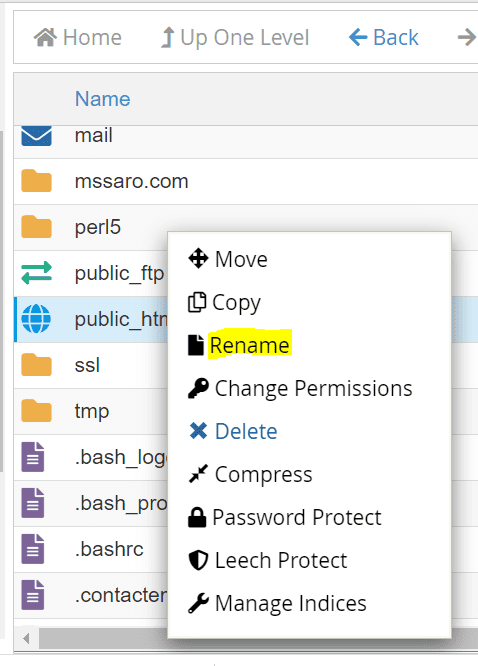
First, rename the existing public_html folder as public_html_old, here we are first making a backup of this folder.
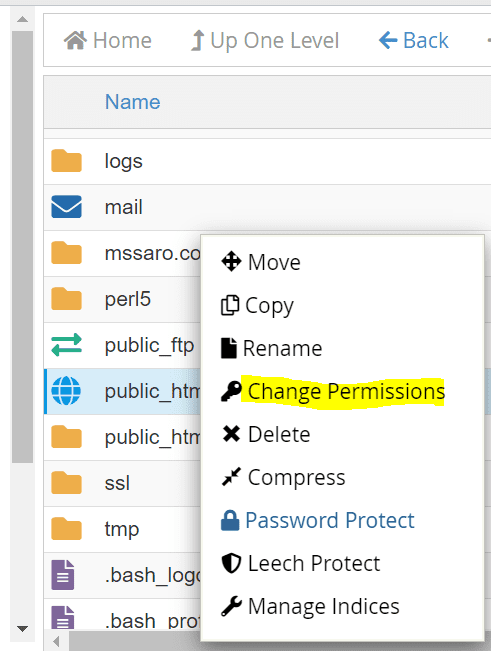
Right-click on the existing public_html folder and click on Rename.

Now we can upload our latest public_html backup folder as a zip from our local to this root directory.
For uploading purposes, we can use some FTP/SFTP based software like WINSCP. Please read How to use WinSCP in Uploading or Downloading the file.
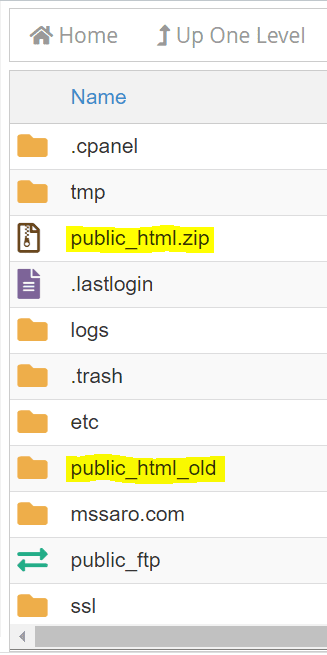
Right-click on the public_html.zip folder and click on Extract.

Provide a path where we want to extract this, as we want to extract this in the same root folder, so I am giving forward-slash(/) only.

unzipping started
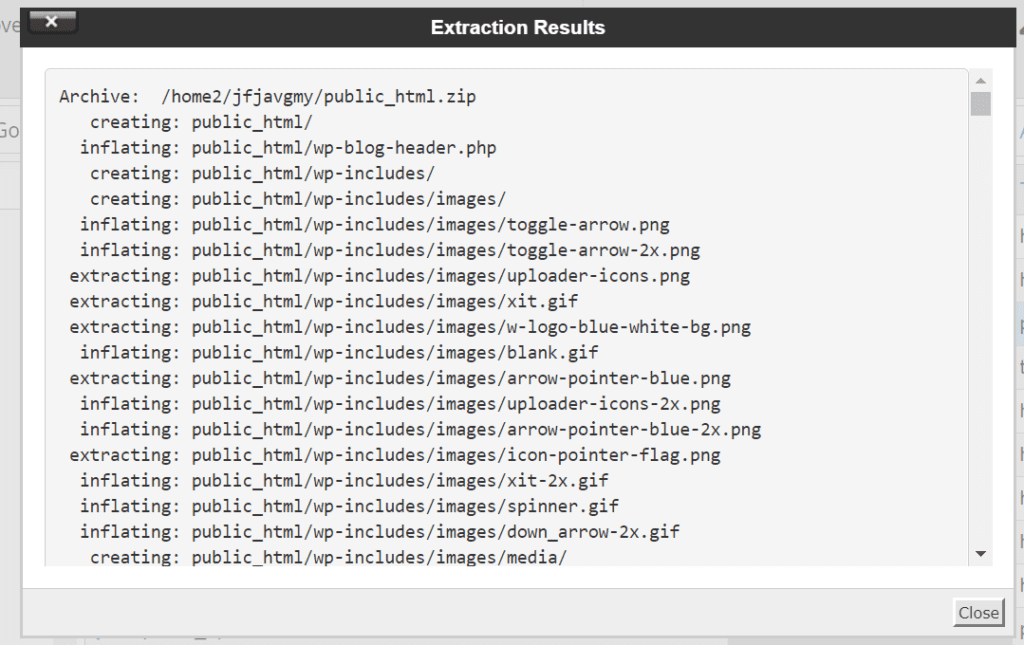
We can see that one new public_html folder has been created in our root folder.
Step 3 : Verify the permission on the new public_html folder
Now we would verify the permission in our new public_html folder
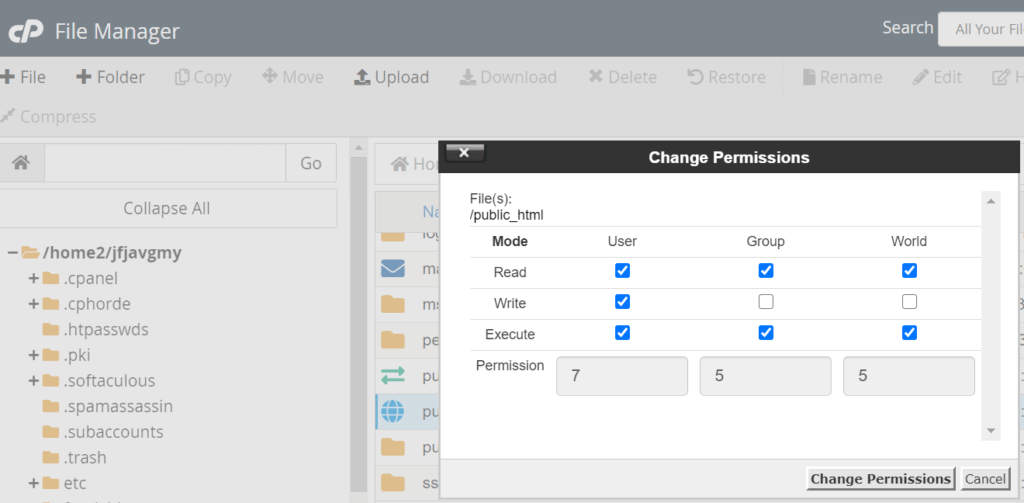
We see on World, and we do not have any permission.

Let’s apply for permission (read and Execute) on World
Step 4 : Import the Database file
Assuming till this point, we have our database backup file as a SQL file.
Now we would import the database backup SQL file.
Before importing the database file, we need to drop all our existing tables.
Log in to your web hosting account and Open the phpMyAdmin tool.
Through the phpMyAdmin tool, First, select all the existing tables via checking the check All link.
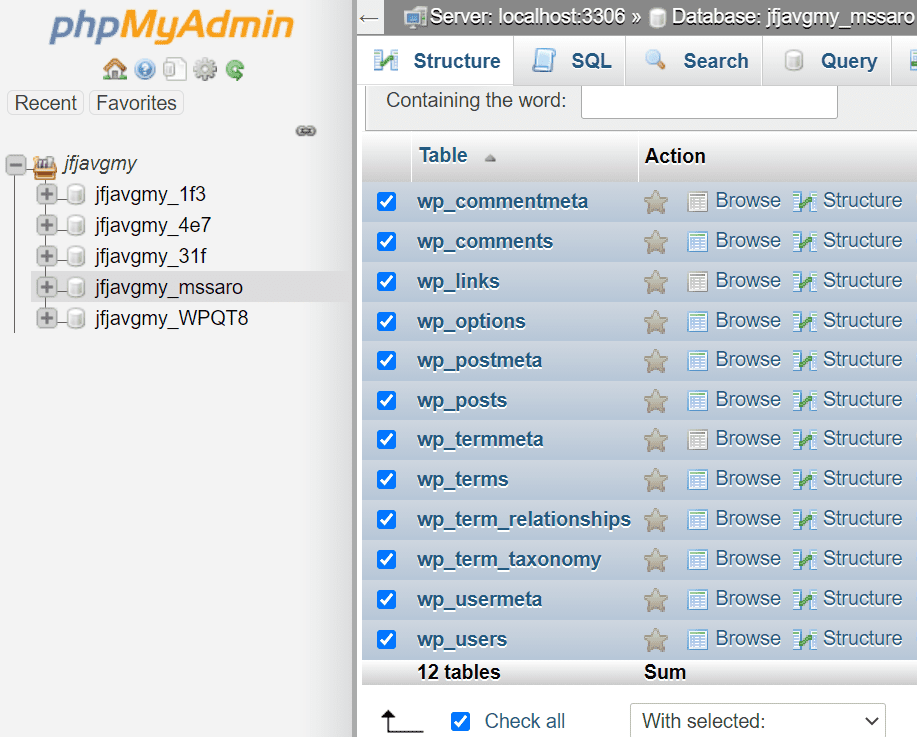
And now select the Drop command.
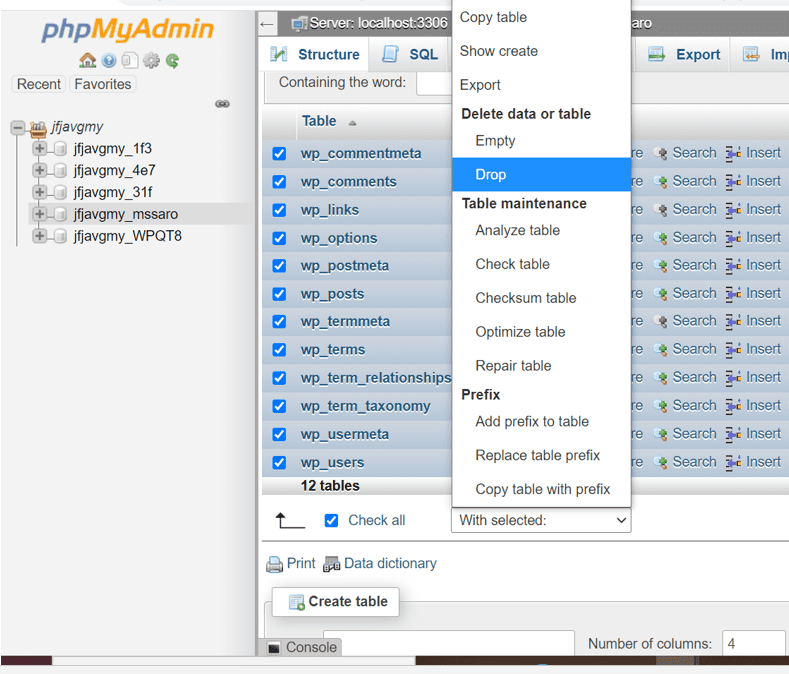
We would get the below window; click on the Yes button to confirm.

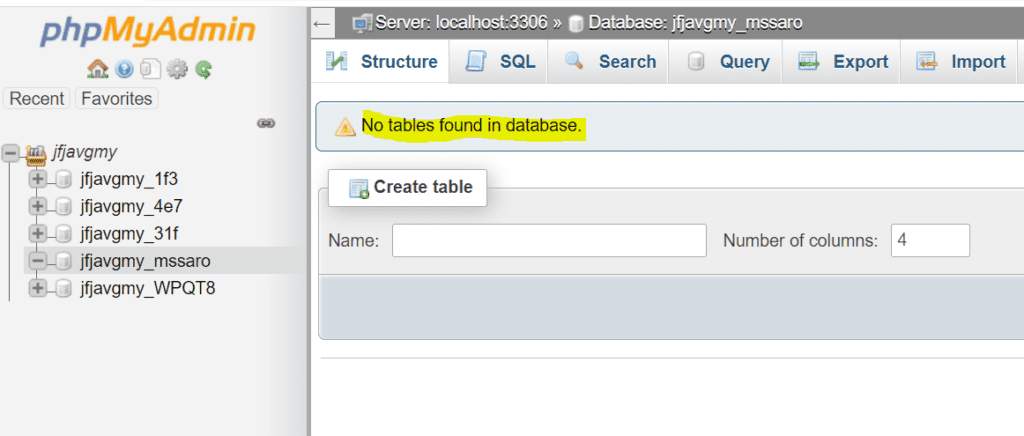
We can see that now we do not have any existing table in our database.
After dropping all the tables, we would import the Database file.
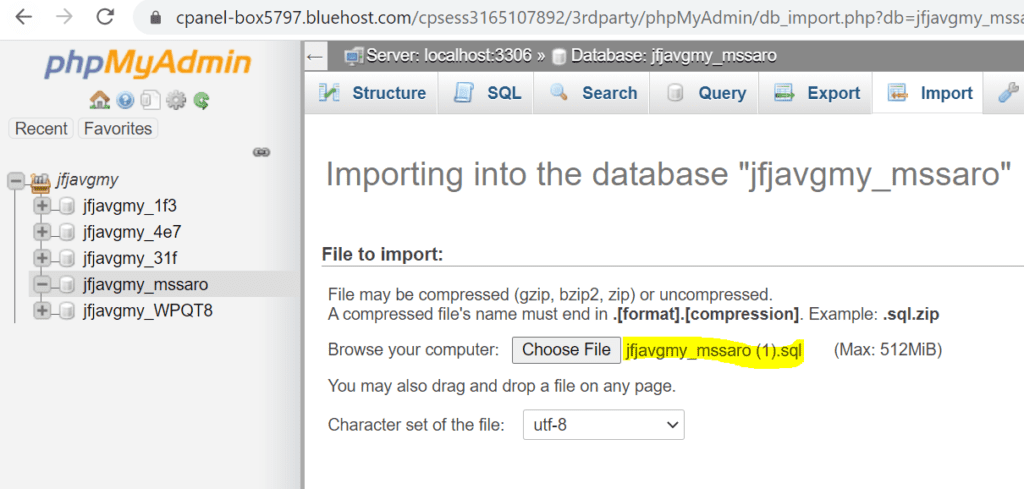
Select our database in the left panel and click on the Import button on top.

To select the database backup SQL file from our local, click on Choose File button
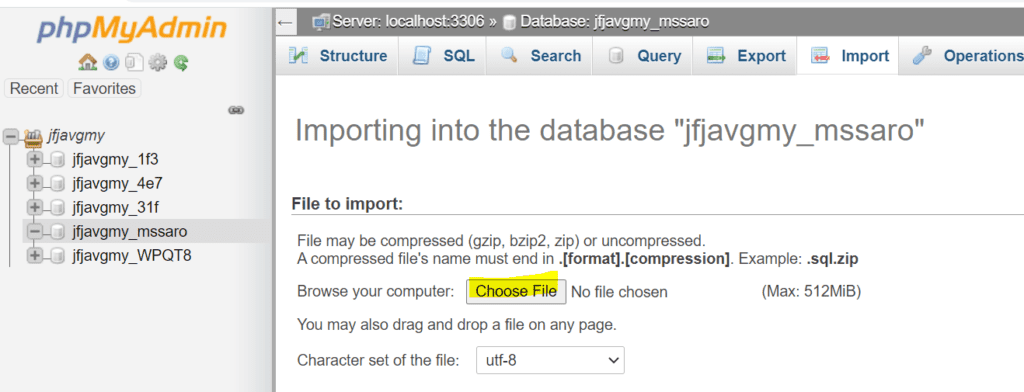
Upload the SQL file from local/anywhere where we store the backup.
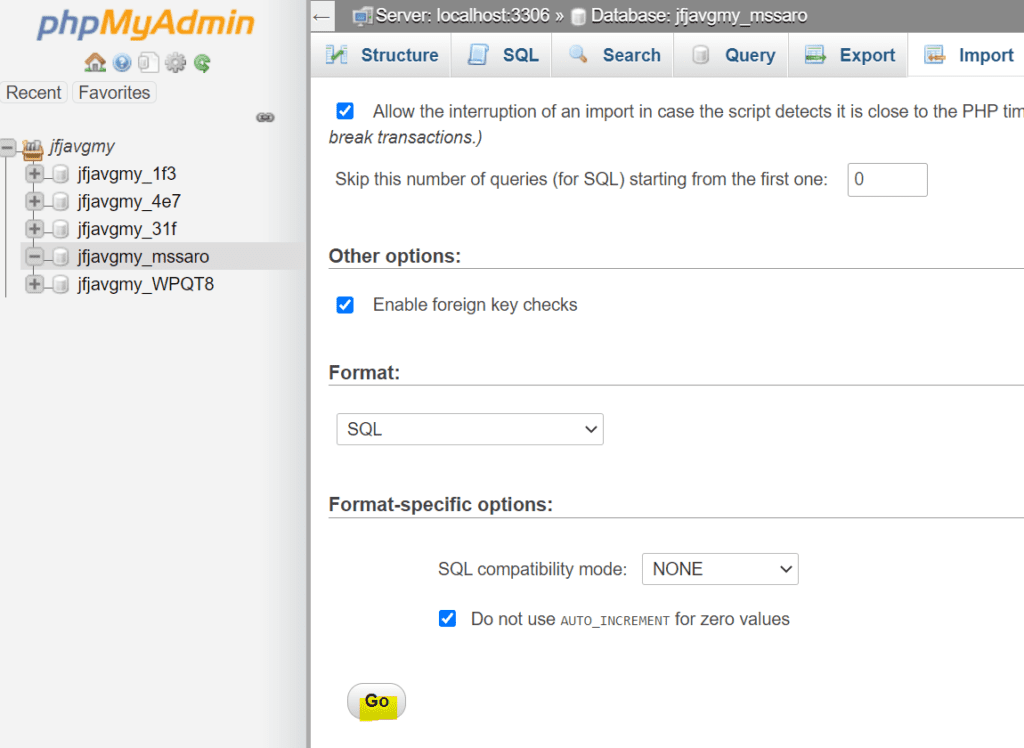
Click on the Go button.
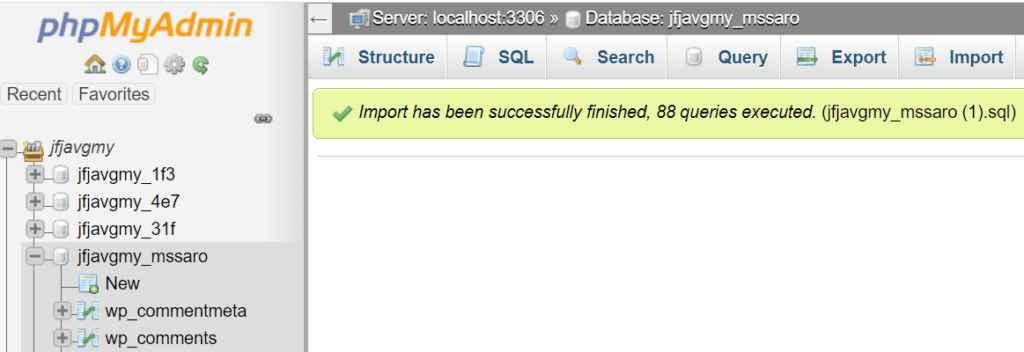
SQL file has been imported successfully as below.
Step 5 : Test our WordPress website
So Now test our stopped website.
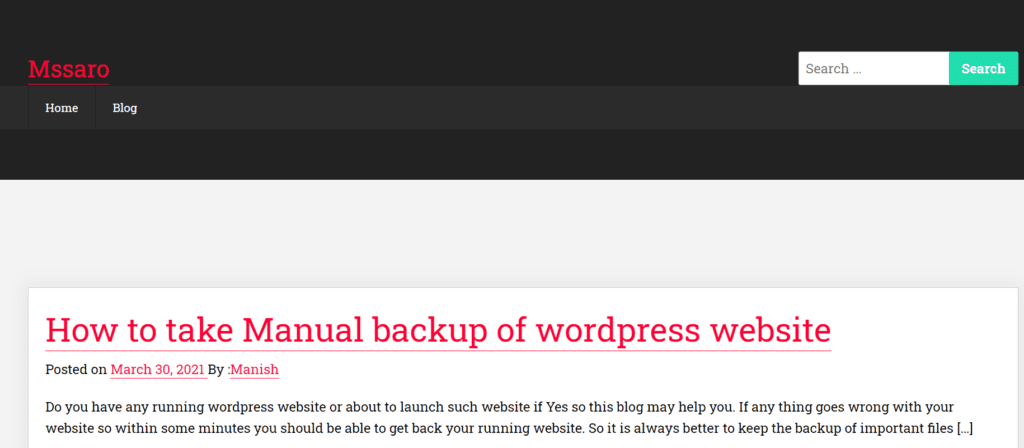
My website https://mssaro.com is running now.
So finally, we have successfully refreshed the production site with our backup files.
Now we can delete the public_html_old folder from our hosting server as all are working well.
At last, always follow the above steps after taking the proper backup from your running website if there is any problem in backup files so that it might cause the problem.
Finally, we have seen that our website is running perfectly.