We often want to set up our local dev environment similar to our WordPress website, which runs on Production (on some hosting servers like Blue host, Godaddy, etc.).
There are many other ways to do this; I am explaining what I usually use in my day-to-day work.
What is Production: It is that environment /computer/server where our website runs, like Bluehost, Godaddy, etc.
Prerequisite :
- At least your one WordPress website should be running on some hosting server like Blue host, Godaddy, etc. My website is running on the Blue Host server.
- You have taken a backup of essential files/folders from Production.
- If you don’t have a backup, please hold on and take a backup first if you want to know how to take a backup of important files/folders, please read How to take a backup from Production.
- XAMPP should be running in your local environment.
What is XAMPP :
- X–> Cross-platform (as it can be used on Windows, Linux, and MAC)
- A–> Apache (as a local server where we can host our website offline)
- M–> My SQL (Database) or Maria DB
- P–> PHP (Language)
- P–> Perl ( Scripting language)
So we can say XAMPP is a package of some software and languages that can run our website offline on our local.
What are You going to Learn from this Blog?
- Step 1: Download and install XAMPP on Windows
- Step 2: Download the WordPress zip file
- Step 3: How to Create a WordPress folder on local
- Step 4: How to Create a local empty Database
- Step 5: How to Setup WordPress on local
- Step 6: Copy the folder/files from Production to local
- Step 7: How to Import the Production database to our local Database
So without waiting, let’s start
Step#1 : Download and Install XAMPP
Download the latest XAMPP.

We have downloaded XAMPP’s exe file. Double-click on this.

Click on Yes.

Click on Next

Select the required items in yellow as above.

I have selected the above path.


Now the installation would be started.

After installation, we see the below directory structure.

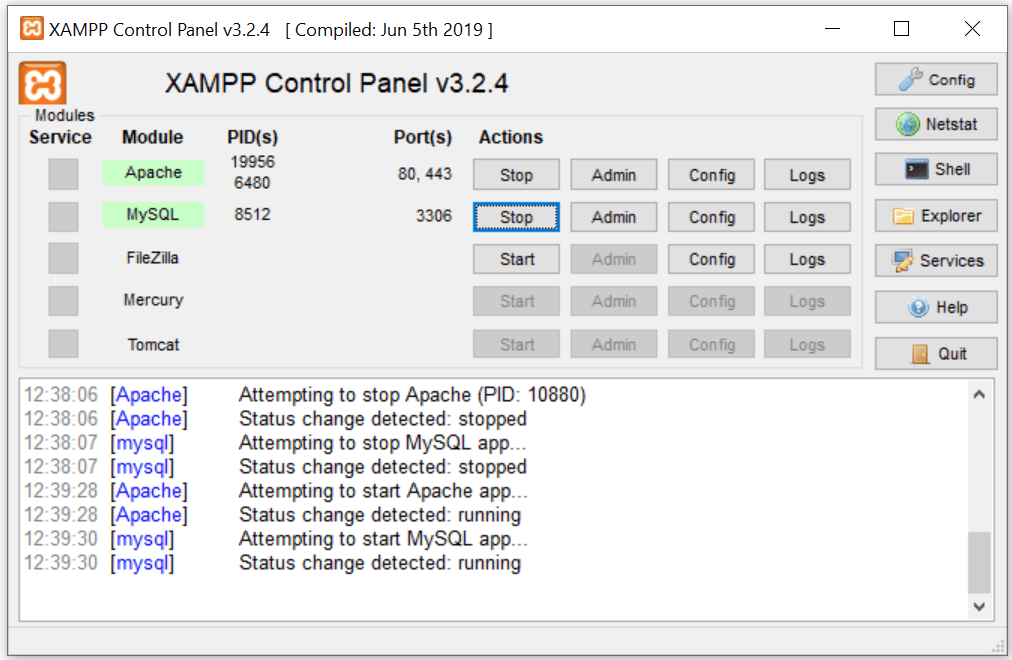
Open the XAMPP control panel and start Apache and MySQL. Click on both Start buttons.
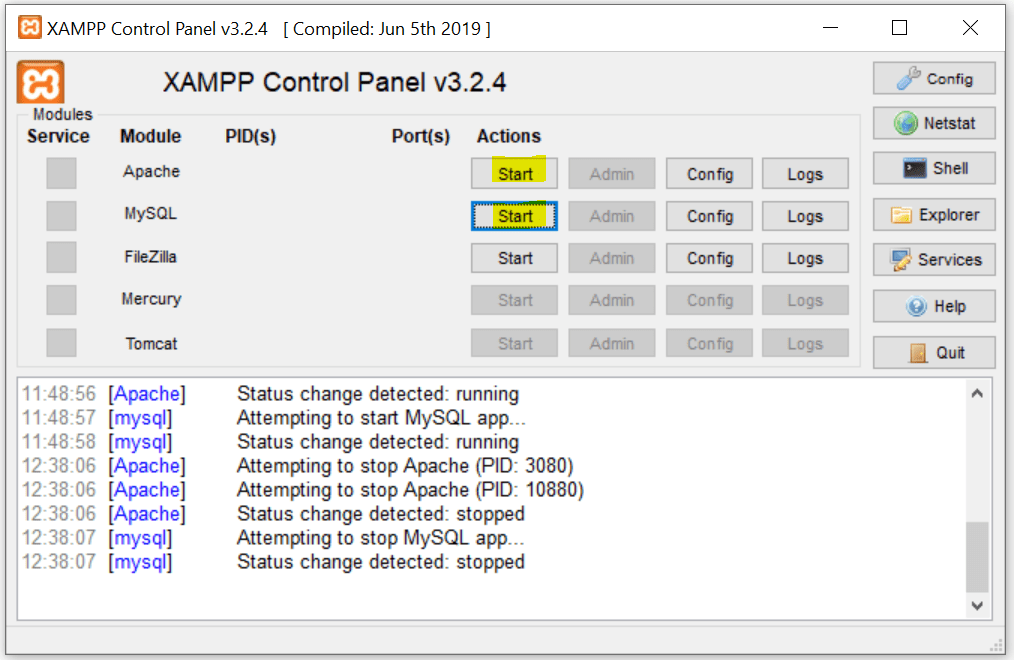
It is running now.
Step#2: Download the WordPress zip file
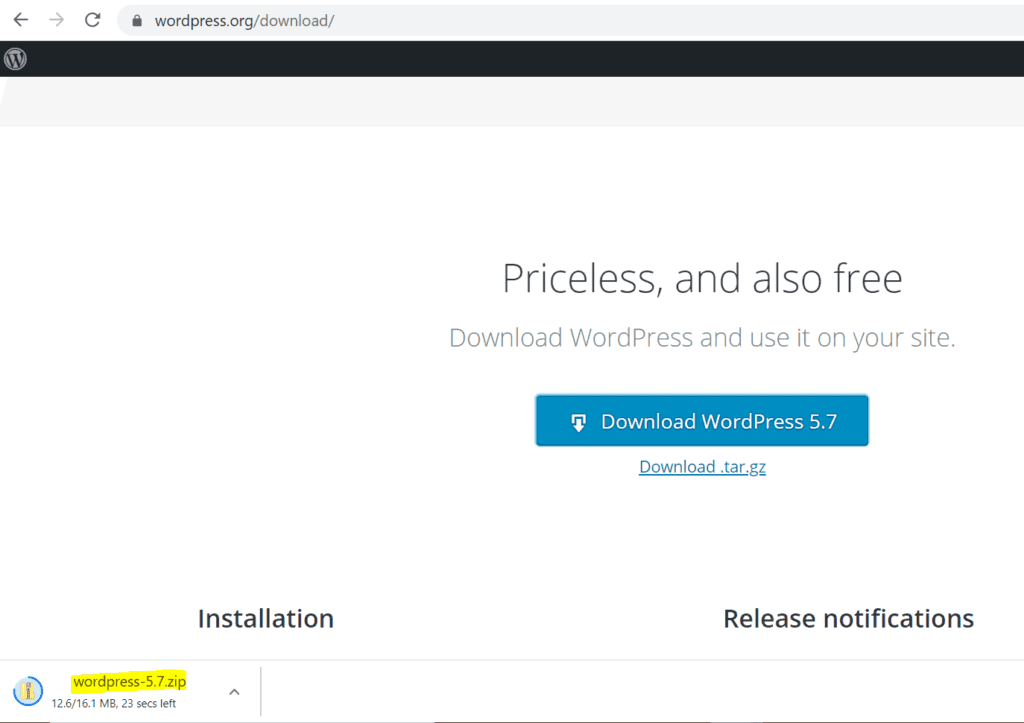
First, download the latest version of WordPress.
You may have to little scroll down the page to download.
In case the above link doesn’t work, google Download WordPress and download this from wordpress.org.
Step#3 : How to Create a WordPress Folder on Local
Unzip the WordPress zip file as below, which we downloaded in Step 2.

If we double-click on the WordPress-5.7 folder, we see the WordPress folder as below

Please copy the above WordPress folder and paste it under the htdocs folder, which is at path C:\xampp\htdocs as below in our local.
If you have some other path for htdocs so use the same, mainly we have to paste the WordPress folder under the htdocs folder

Change the name of the WordPress folder from WordPress to mssaronewdev (it would be treated as a single website).
I mean to say that I want to create a website with the name mssaronewdev on local.
As I already have mssarodev on my local, I am taking my name as mssaronewdev.

If we Double Click on mssaronewdev, we see the following folders and files: WordPress files/folder.
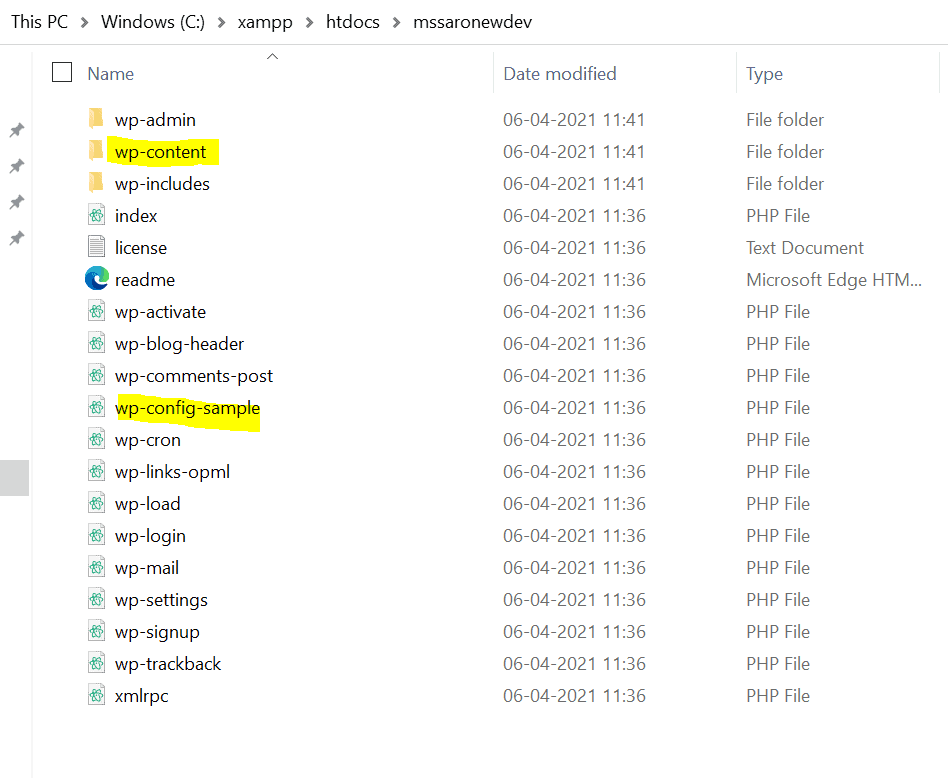
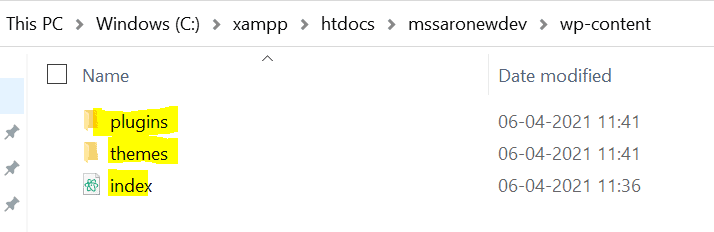
Where the wp-content folder and wp-config-sample file are essential for us, let’s understand what those are.
- Wp-content: In this folder, WordPress stores our theme, plugin, images, etc. All these are related to our website.
- Wp-config. sample: At this time, it is just a sample file; we have a specific configuration to our Database and more. The wp-config.php file would be created during installation; we would see this in a couple of minutes.
We need to focus on the wp-content folder, which has the following folders and files.
- Plugins (folder): It has all the plugins which we are using on our website.
- Themes (folder): It has a theme that we are using in our project.
- Index: It is the default PHP file.
Note: One important thing is if we would have the images on our website so one more folder would be created under wp-content with name uploads. At this time, no uploads folder exists in this.
Step#4 : How to Create a local empty Database
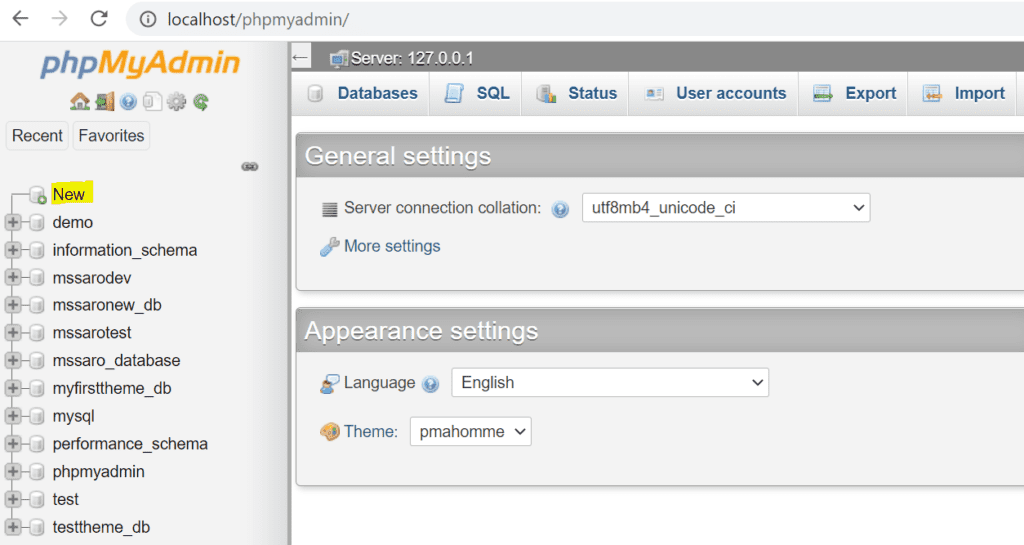
Through the phpMyAdmin tool, we can create a Database.
What is phpMyAdmin: It is a free tool used for admin tasks (for MySQL & MariaDB database servers).
- For Creating database
- For importing/exporting Database
- We can run many SQL queries like create, alter, update, drop, delete, etc., and many more…
To run the phpMyAdmin tool on our local, we can use the below URL.
Note: Before clicking the above link, Your Apache and MySQL should be running through your XAMPP Control Panel.
If it is not running so, please run both.
Click on the New (left panel) to create a new database.
Given the Database name as mssaronewdev and click on Create button.
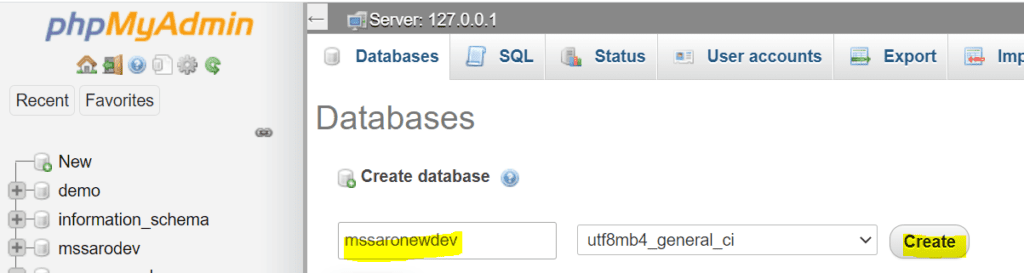
Now one empty Database (named as mssaronewdev) has been created as below.

Step 5 : How to Setup WordPress on Local
Use the below URL below.
Note: Before clicking the above link, Your Apache and MySQL should be running through your XAMPP Control Panel.
We get the below window. Select the language and click on the Continue button.

Getting the below window for database configuration

Click on the Let’s go button.
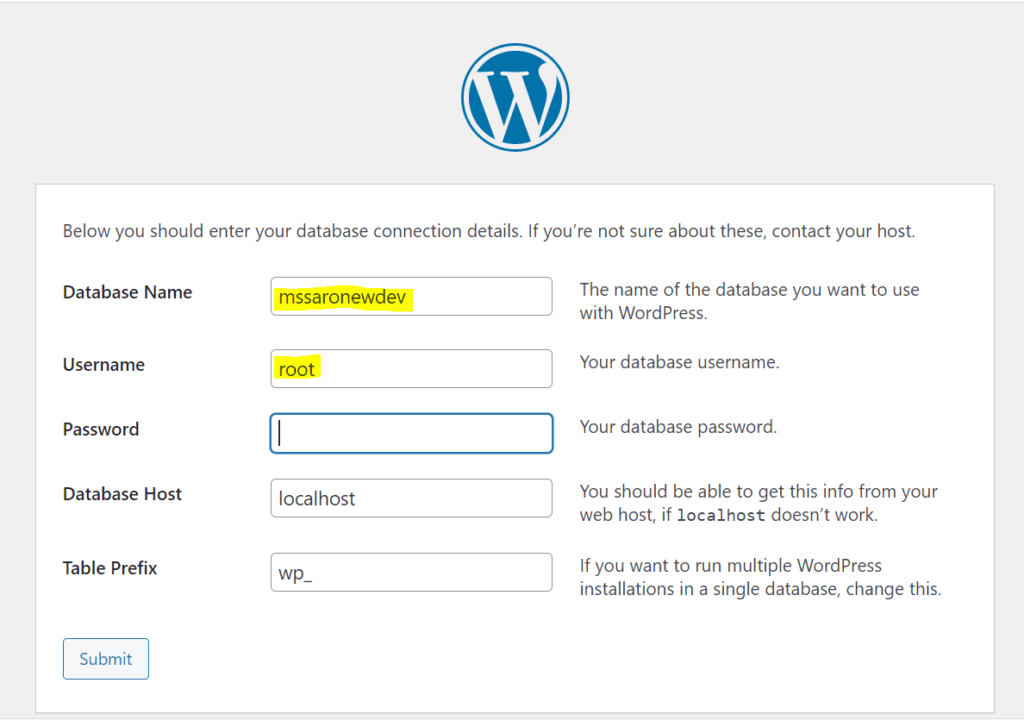
Provide the below information and click on Submit button.
- Database Name: mssaronewdev (our empty database ,which we created in Step 4)
- User Name: root
- Password:
- Database Host: localhost
- Table Prefix: wp_
let the password blank.
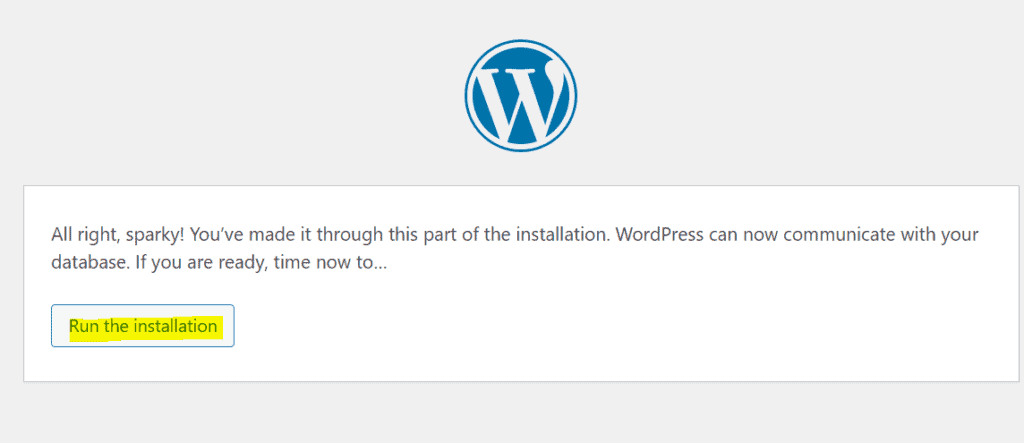
Click on the Run the installation button.
Now we get the window where we configure the admin user for our local WordPress Dashboard.
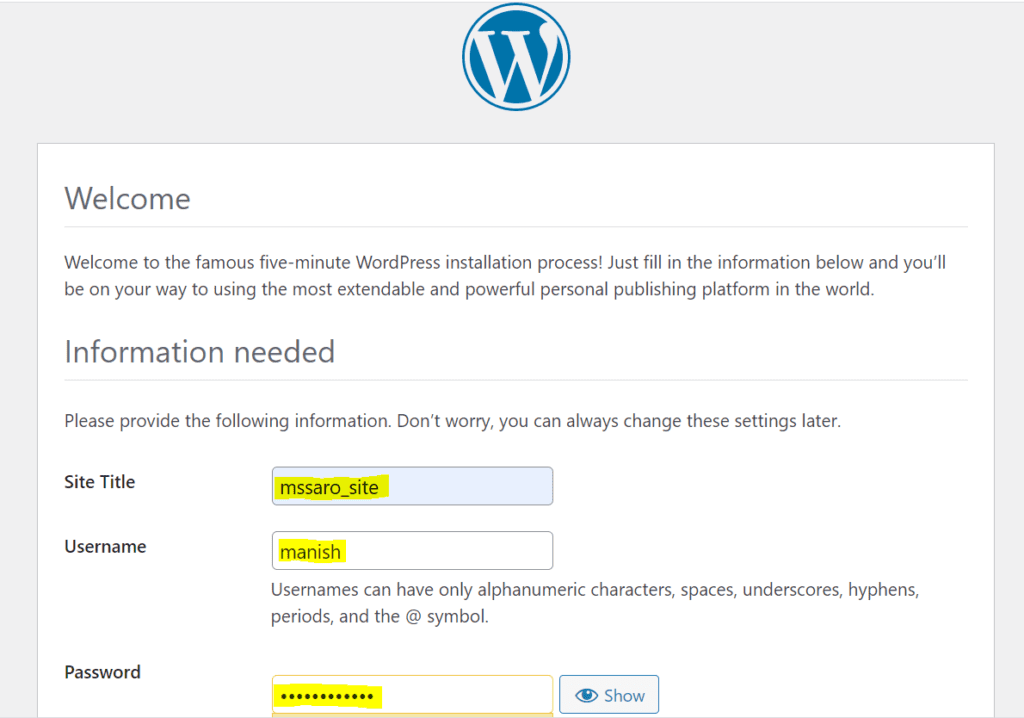
Provide the above information and remember the username/password to log in to the WordPress Dashboard portal.
Click on the Install WordPress button in the above screenshot.

Congratulation! we have successfully installed WordPress in our local.
Let’s login into the WordPress Dashboard portal to check this; use the below URL.
http://localhost/mssaronewdev/wp-admin
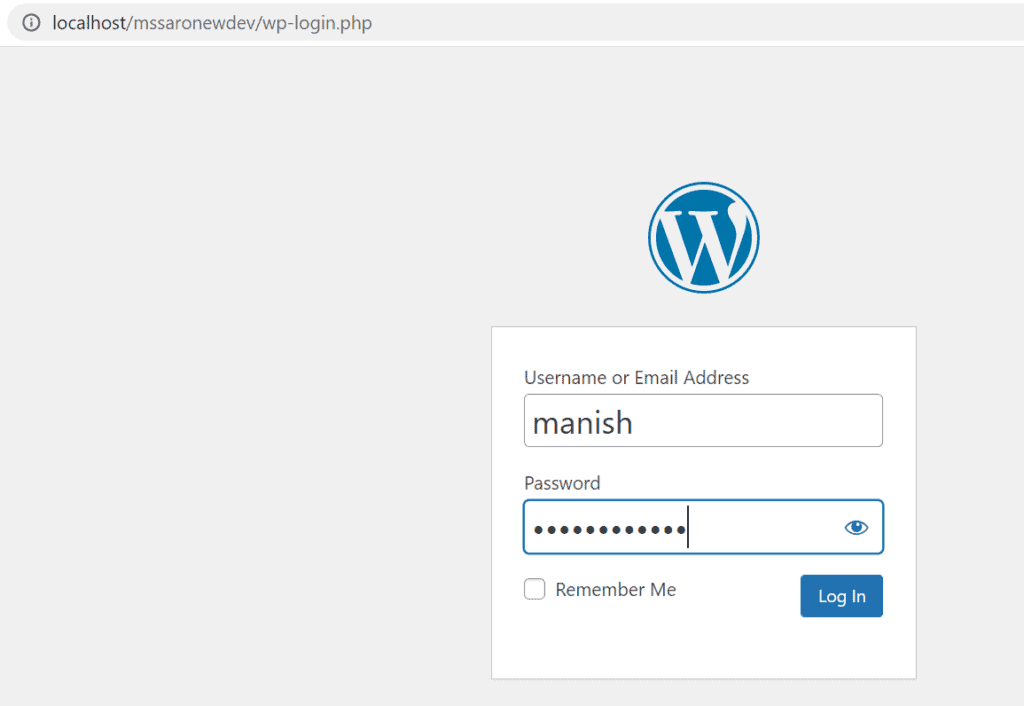
Provide the username/password we have just created during the setup of WordPress and click on the login button.
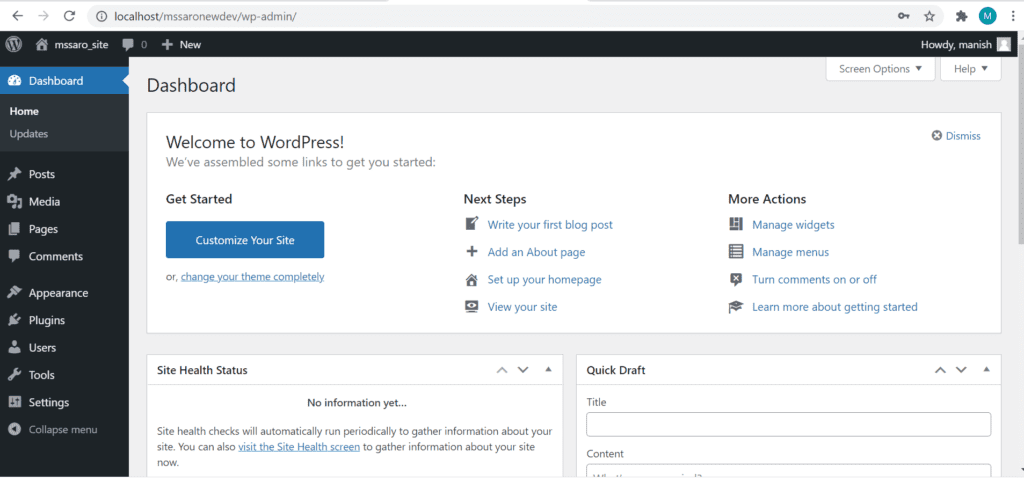
Great! We can see the WordPress Dashboard portal in our local.
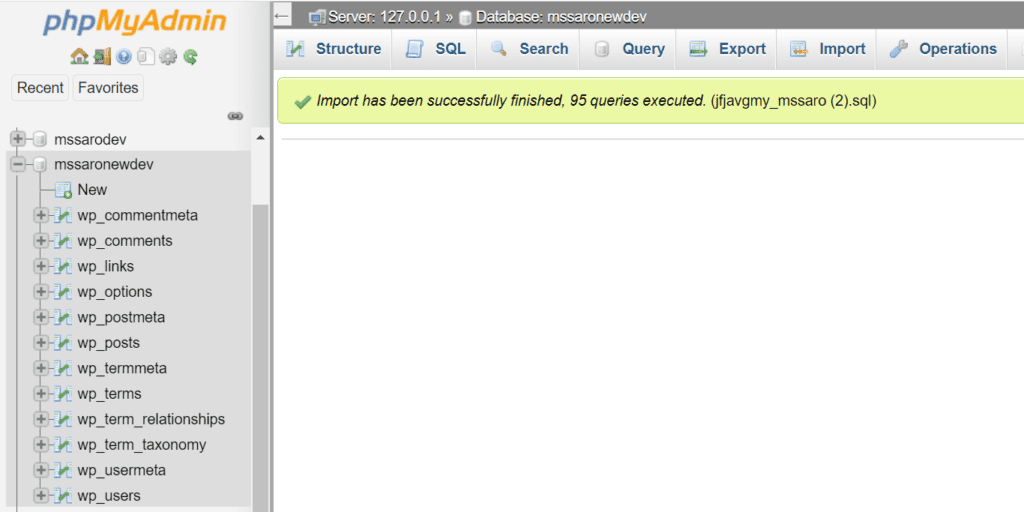
Also, we can observe that now in our Database, all the WordPress tables have been created.
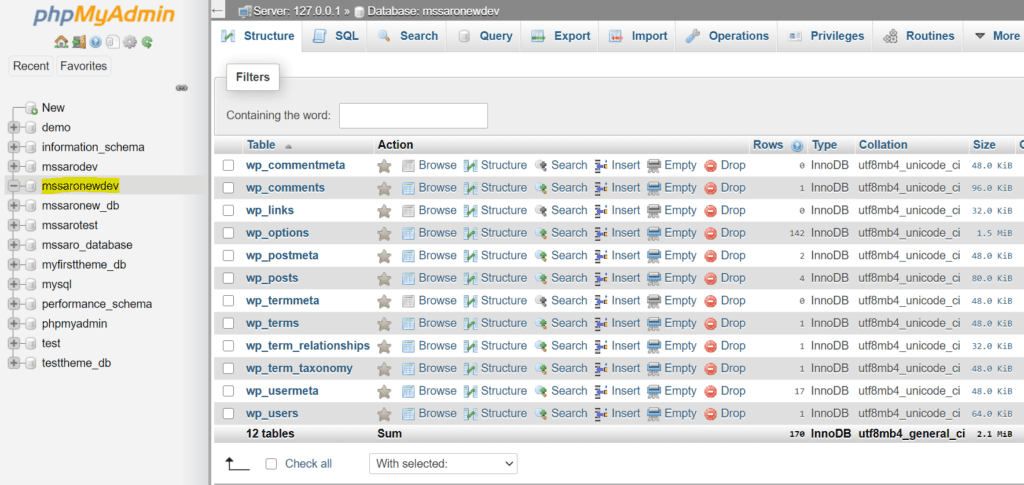
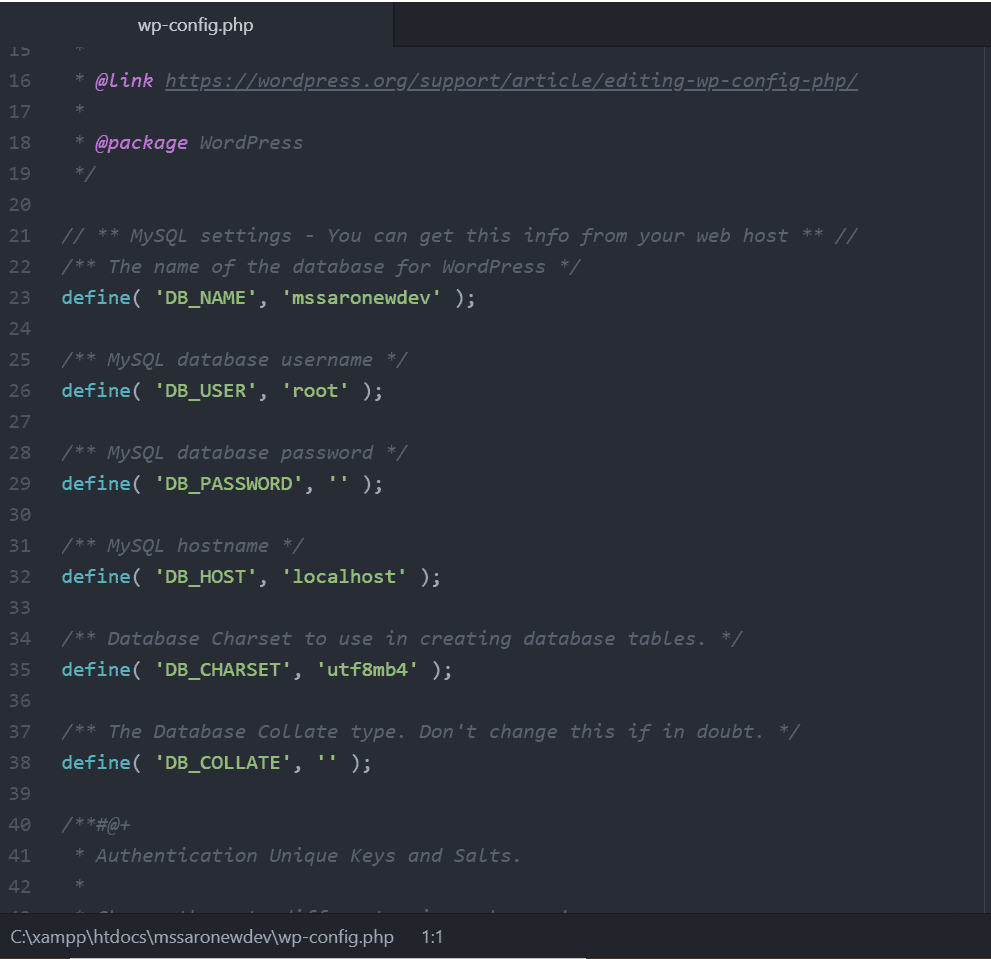
Also, we can see that our wp-config file (under path htdocs/mssaronewdev) has been generated where we have our database details.
Step 6 : Copy the Folder/Files from Production to Local
I am in the habit of taking the regular backup from my hosting server( Blue host where my website is running).
I have taken the backup, and at this time, it exists in my local system.
We usually have to copy the following folders from Production.
Copy Theme folder (from Production):
For this blog I’m using one customize theme named as mssarotheme, which is running on Production.
My website theme folder name is mssarotheme which is under path wp-content/themes/mssarotheme.
I would copy the complete mssarotheme folder.

Paste Theme folder (in Local):
Paste the mssarotheme folder at path wp-content/themes in our local.

Copy Plugin folder (from Production):
I am not using any plugin as of now.
But if you are using so, it should exist under path wp-content/plugins.
Assume if you have 3 plugins as below.
- wp-content/plugins/myplugin_1
- wp-content/plugins/myplugin_2
- wp-content/plugins/myplugin_3
Copy all your plugins folder (myplugin_1 , myplugin_2 , myplugin_3) from here.
Paste Plugin folder (in Local):
Paste the myplugin_1 , myplugin_2 , myplugin_3 folders under path wp-content/plugins
Copy Images (from Production):
All the images exist under the uploads folder in the wp-content folder.
If you have images, Copy complete folder uploads from wp-content/uploads
Paste Images (in Local):
Paste the uploads folder under the wp-content folder.
Note: You can also read How to Take Backup of the WordPress website for more details.
Step 7: How to Import the Production database to our local database
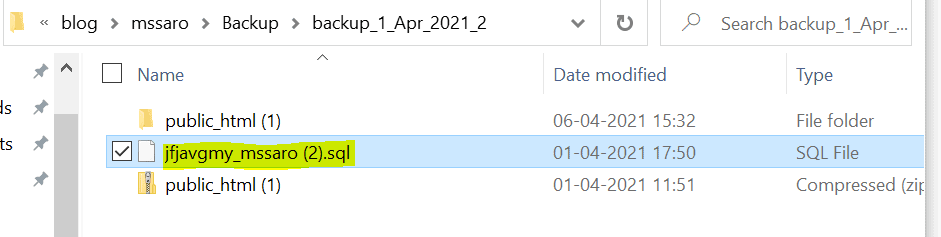
I have a database backup from Production (Blue host server where my website is running) in an SQL file below screenshot. It exists in my local system.
If you want to know how we can take a backup of our database, please read How to Take Backup of WordPress website in Step 4.
Now we are going to import the production database in our local.
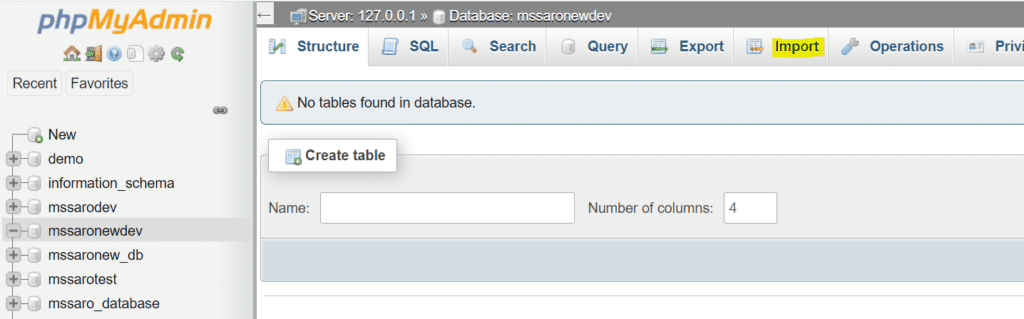
Open the phpMyAdmin tool page and select our Database, which we created earlier.
To select all the tables, click on Check all as below.
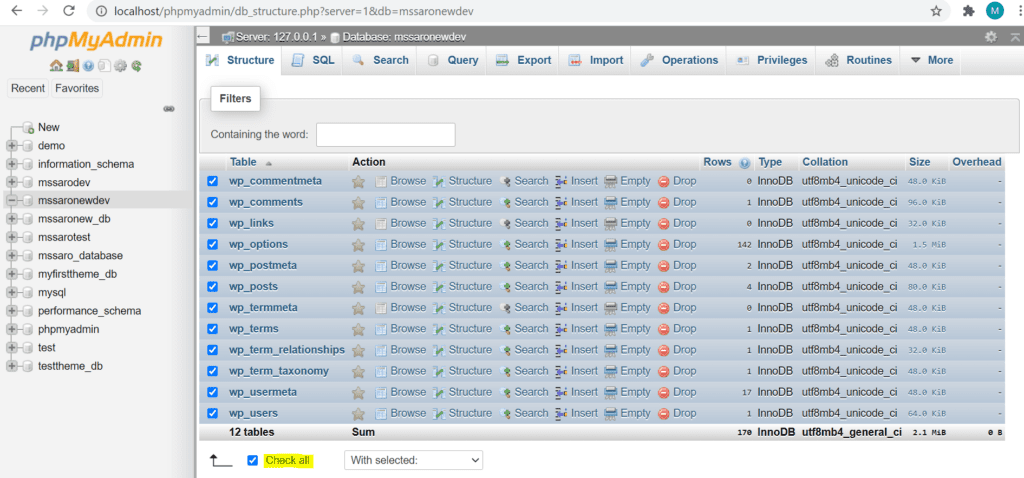
And select the Drop command as below. We need to drop all the existing tables before importing the Database.

Confirm Yes as below. It might be multiple times.

We can see below that all the tables have been dropped.

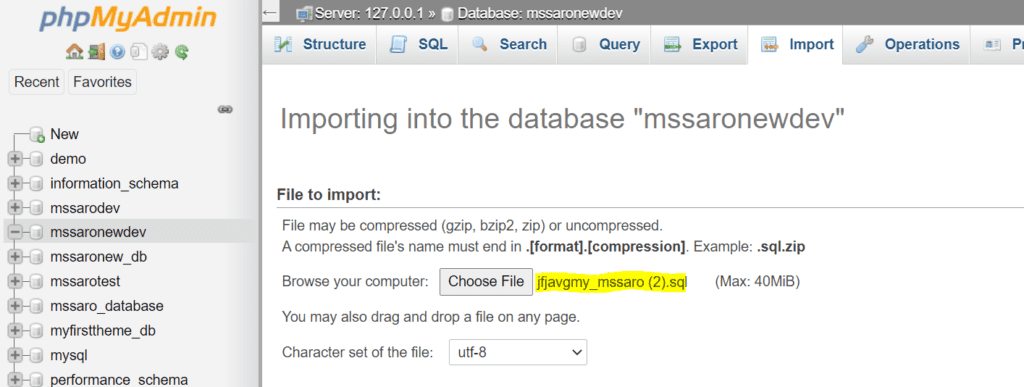
Now click on import.
Select the SQL file (which we take from the production environment as backup) from local.
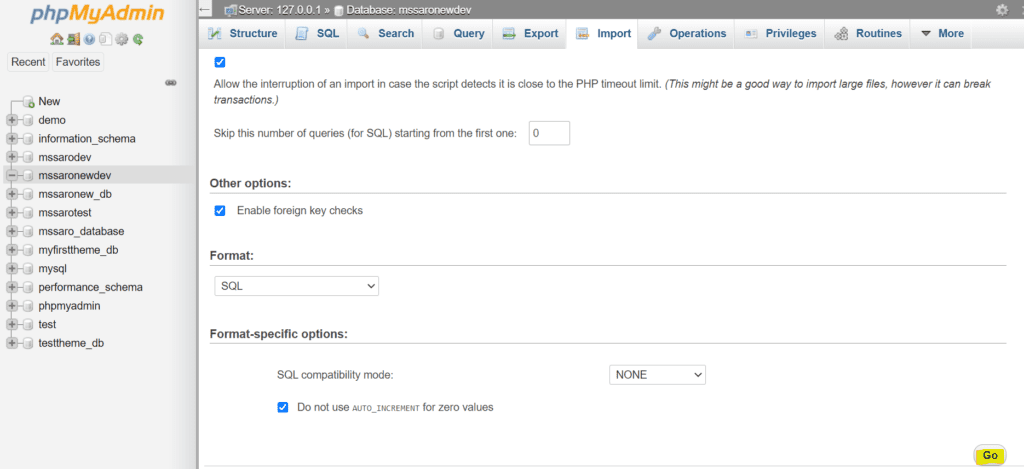
And click on the Go button.
Import has been done successfully.
Tips:
Even though we have restored all the backup files in our local, we still may face some problems running the local website.
Let’s check.
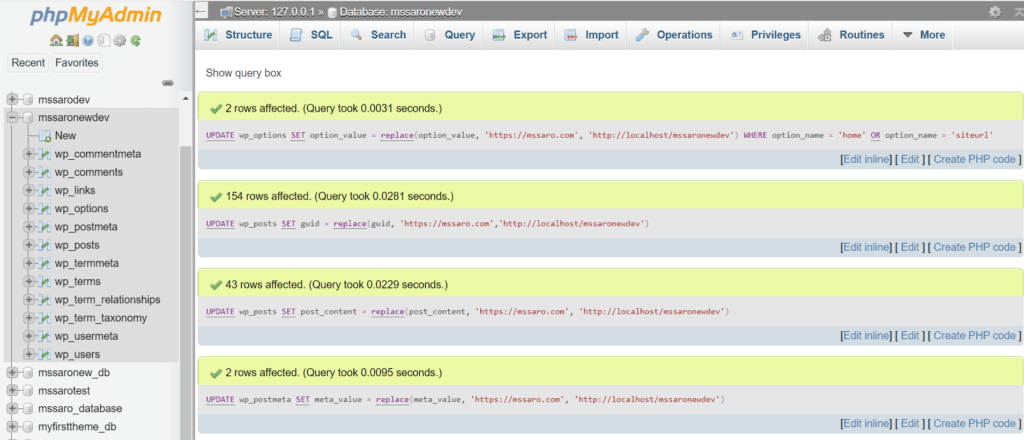
Tip 1: We have to run the below update query in our local Database.
UPDATE wp_options SET option_value = replace(option_value, 'https://mssaro.com', 'http://localhost/mssaronewdev') WHERE option_name = 'home' OR option_name = 'siteurl';
UPDATE wp_posts SET guid = replace(guid, 'https://mssaro.com','http://localhost/mssaronewdev');
UPDATE wp_posts SET post_content = replace(post_content, 'https://mssaro.com', 'http://localhost/mssaronewdev');
UPDATE wp_postmeta SET meta_value = replace(meta_value, 'https://mssaro.com', 'http://localhost/mssaronewdev');
Why do we Need to Run the above Update Statement?
On Production, my website name is https://mssaro.com
But on my local, it is http://localhost/mssaronewdev , so that needs to be updated in our local.
That is why we need to run the above UPDATE statements.
Click on the SQL tab below, copy the above SQL update statement, and click on the Go button.

Updates done.
Tip 2:
At this time, we may not be able to log in to the WordPress Dashboard portal with the user name we created in Step 5.
Because after WordPress installation, we imported the production database into our local Database, and the user might have overridden it.
So here we resolve this in 2 ways.
- Use Production’s username to login into the WordPress Dashboard portal local. And use the same password which we created in Step 5.
- Update the user table as well which I am not updating here.
Now we would run our local environment.
http://localhost/mssaronewdev

Great! Our local is running perfectly.
Now we have a local WordPress setup similar to our production website.
So before releasing any code, we can test first locally and then can move to Production.
Many types of R&D we can do on our locally, which is excellent.
Keep Smiling and Start Sharing!