
After creating a website, the most important thing to know is How to track the user on your website.For this purpose, you need to add your website to Google Analytics.
You should know how many users are hitting your website daily and many other users’ data.
So, here Google Analytics comes into the picture. It is a free powerful tracking tool, provided by Google.
Nobody can ignore the power of Google Analytics. It provides some of the most valuable reports, which can be very helpful in understanding the user interaction with your website.
Let’s see how to add your website to Google Analytics in simple steps.
Step 1: Create a Google Analytics account. For this, you need one working Google account like Gmail.
Step 2: From Google Analytics, get the Universal account id or code (which has this Universal account id ).
Step 3: Keep this Universal Acct Id /code on your website.
I will tell you where to keep this on your website in a moment.
Here you have many ways to keep this universal account id on your website. I will explain in a couple of minutes.
Step 4: Within one/two hr, Google Analytics will start collecting the data from your website.
Step 5: You can see the user data in a graph in your Google Analytics acct.
Ok, let’s start in detail.
Google Analytics Setup and Get the Universal Account ID
To use Google Analytics, first, you should have one google (like Gmail) account. If you have this, you can go to google analytics.
Just login into your Gmail account/directly opens your Google Analytics account.
In case of any problem, in the new tab, open the google search engine and type google analytics, and you will get the link to Google Analytics on the first page.

Just click on this. If you are creating your Google Analytics acct for the first time, you have to do your basic configuration as follows.
- Account Setup: Provide your account name as you wish.
- Property Setup: Give your property name like your website name or anything which you want
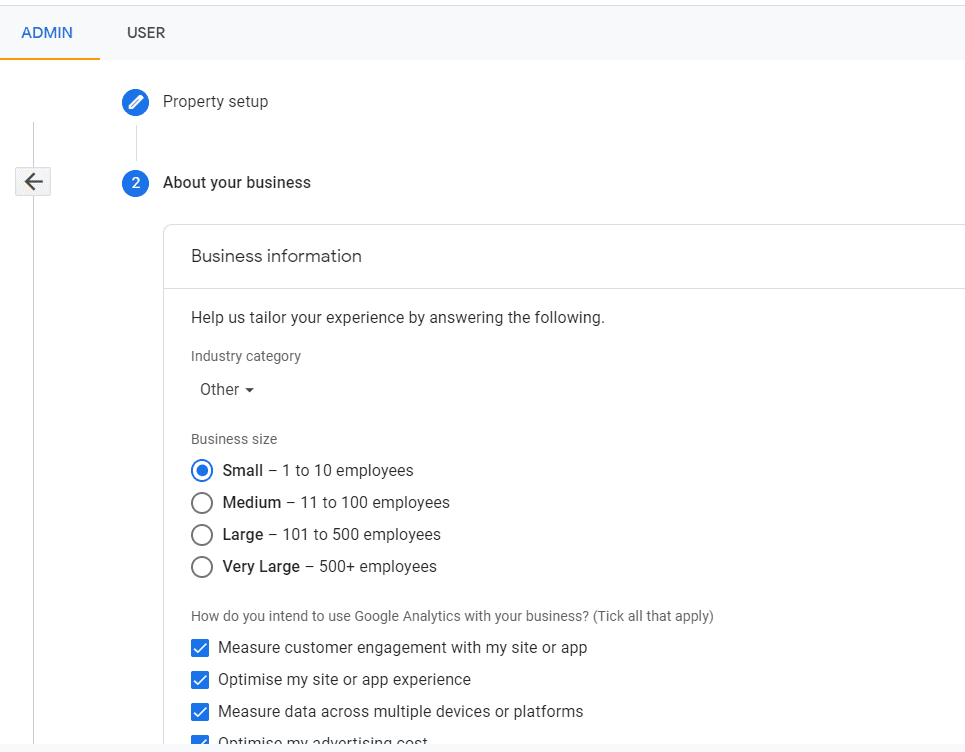
- About your business: Some business information.
After providing all the above details, hit the Create button.
And now you have a Google Analytics account.
If you have already set up Google Analytics earlier so no need to setup.
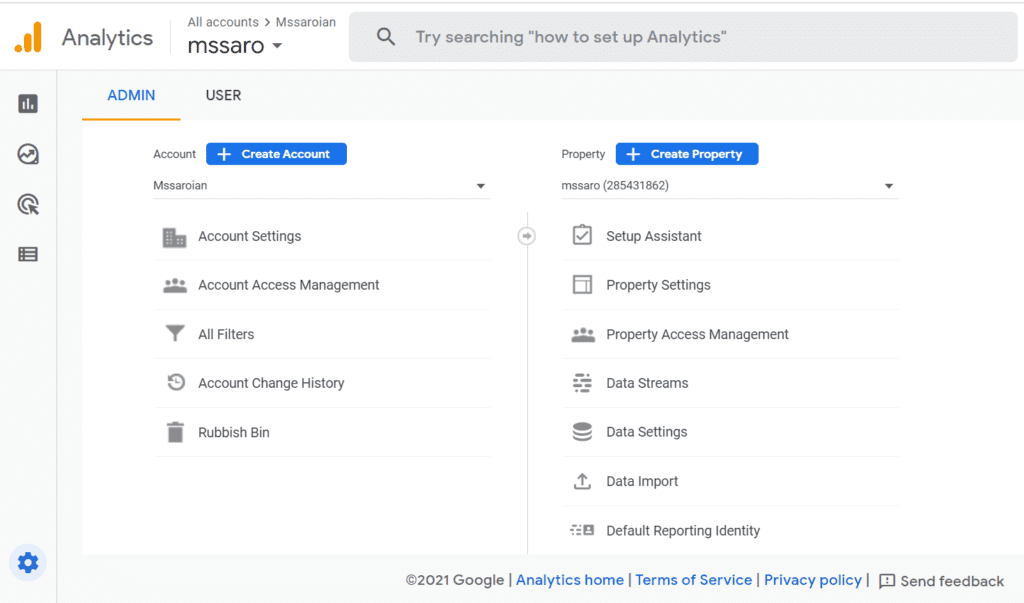
Under Google Analytics, create one property. Click on the Create Property Button.
Provide property name, and it may be any name you wish related to your site. I gave mssaro UID.
Select your country’s time zone and currency type.
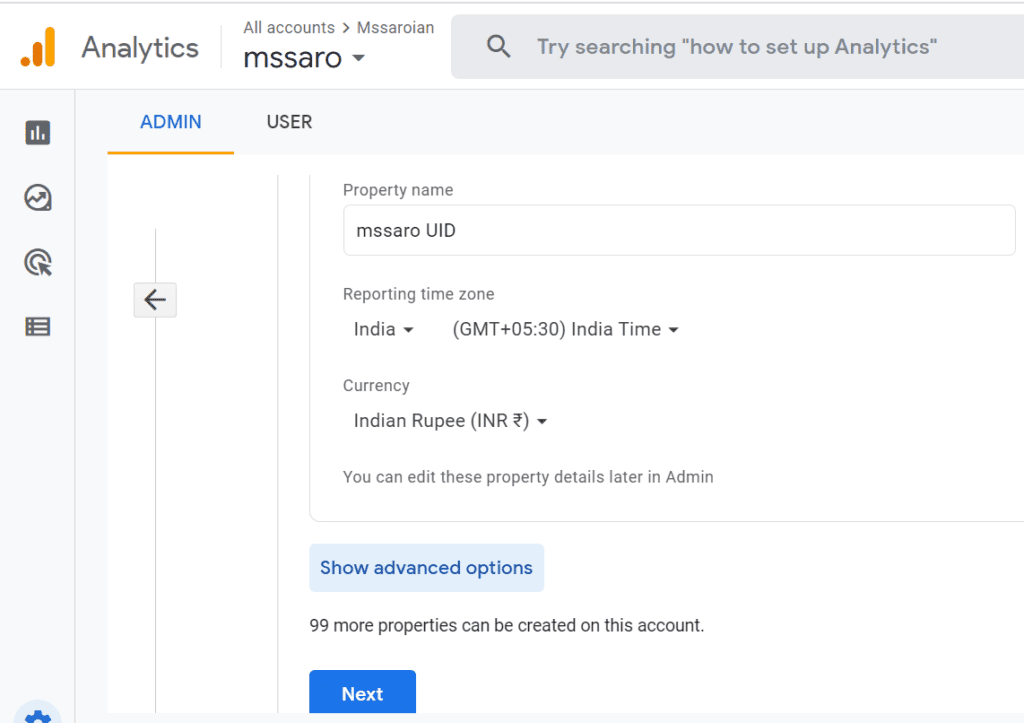
One important thing, do not miss to click on the Show Advanced Options button above. Click this.
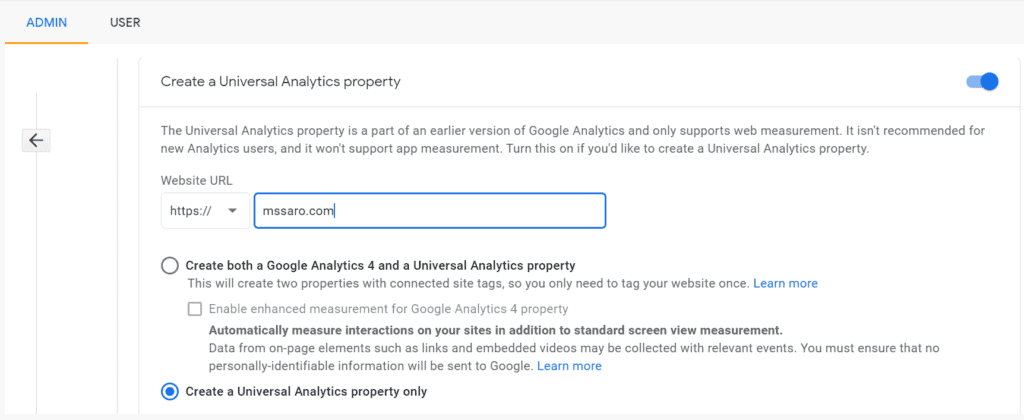
Now select the Create a Universal Analytics property.
Most of the environments support only Universal Analytics property for tracking purposes.
And also, provide your website name.
And click on the Next button. And fill in your About your business details.
And submit this.
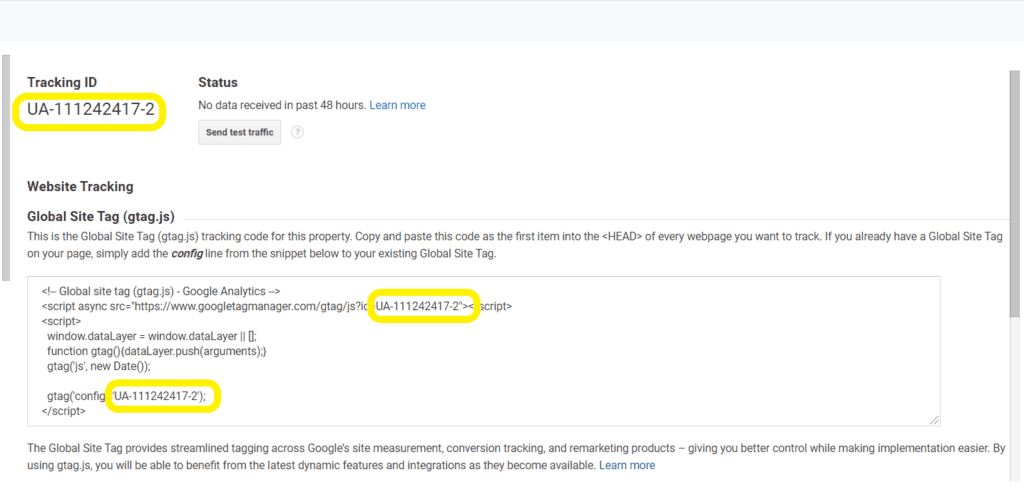
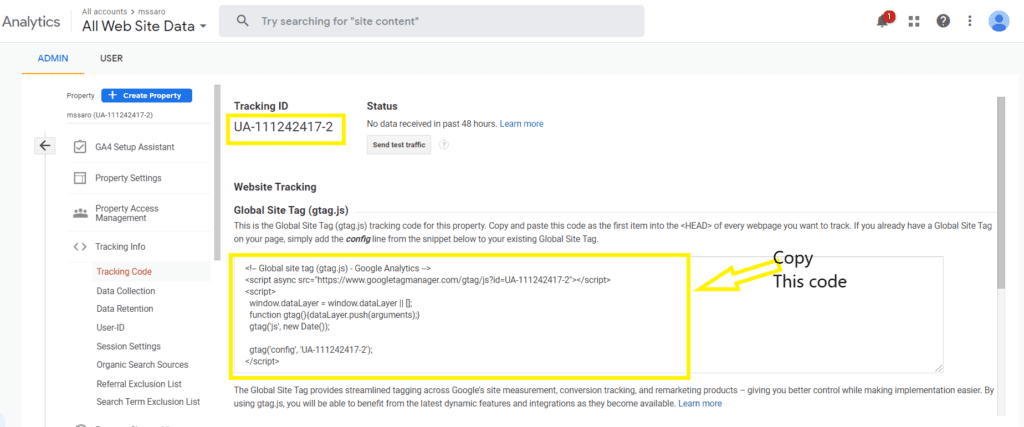
Now you would see your tracking ID as UA-****
So from this page, you get 2 things
- Tracking ID: UA-*****
This UA-***** is the tracking ID that Google Analytics uses to track your user on your website.
This Tracking code you have to keep on your website.
Some custom theme in their premium version provides the place in their website theme where you can enter this tracking ID and work done.
And Google analytics would start collecting your user data from your website.
- Google Site tag (gtag.js)
This is some code (consisting of a tracking code) that you need to add to your website theme.
So, from here, copy the code.
Google Analytics provides the tracking ID /code to you, and this tracking ID/ code you have to put on your website. There are many several ways I am explaining 2 ways.
- Manually copy the code to your website
- Use some plug-in to use tracking ID/code
Let’s see them one by one.
Manually copy the Universal Account ID code to your website without any plug-in.
You have already copied the code from the previous section.
As per Google, you must paste this code as the first item to the <HEAD> of every page you want to track.
Now let’s see how you can add the code to your word press website theme.
Generally, we have a header on each page on our website, so we can include this code in the header.php file.
Under your WordPress Dashboard, Click on Appearance–>Theme Editor
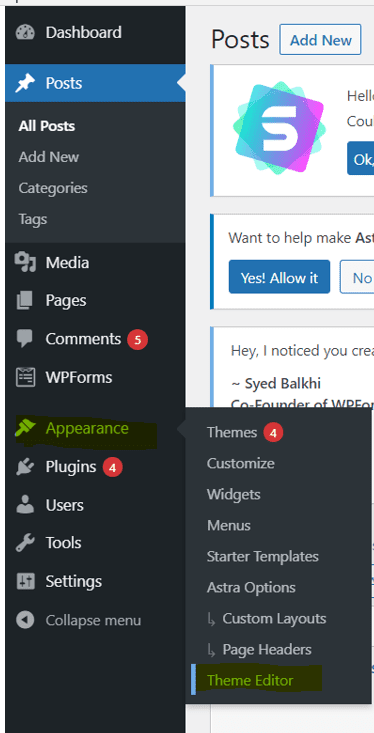
Right-click on the header.php file.
And paste the copied code under the <head> tag in the first position
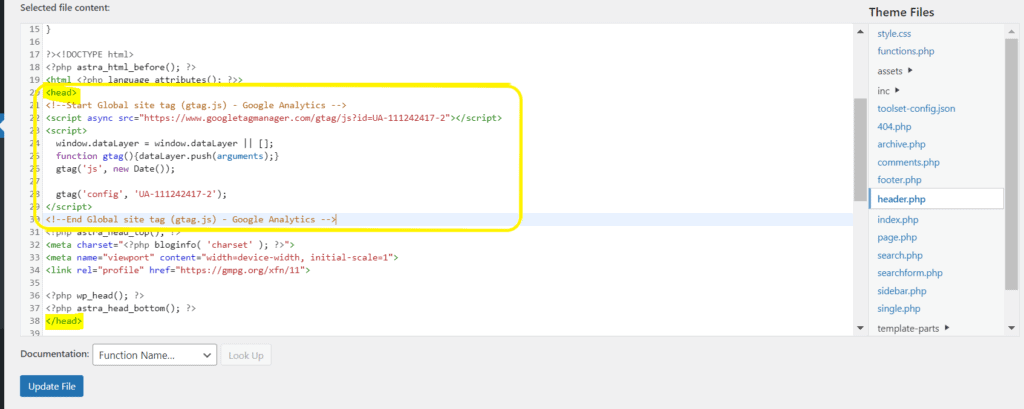
And click on update the file. It is done now.
How easy it was!
One important thing before pasting the code here, take a backup of your complete website or at least of this code. In case of any problem, you can replace this with the backup file.
Now, all done, within 1-2 hr, Google Analytics will start collecting the user data from your site. You can see those reports in your Google Analytics acct.
Let’s see the 2nd way to track the website users.
Use Some good Plug-in to add Google Analytics to WordPress
Plug-in is one of the easiest ways to add your google analytics to your WordPress.
You must install good plug-ins for tracking if you don’t want to do anything manually (copy/paste).
But before using any plug-in, your Google Analytics account should be set up, and you should have a tracking Id ( UA-*****) / code.
If you do not have one, follow the previous section to set up and get the tracking ID(UA-*****)/code.
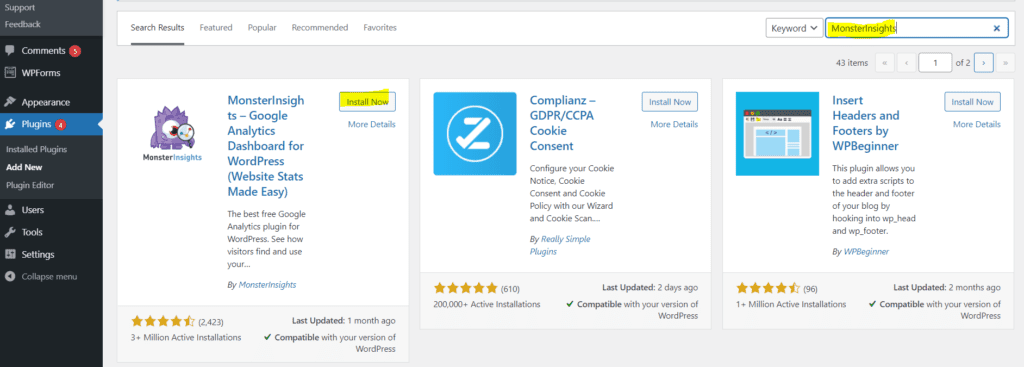
A very famous and popular plug-in is MonsteInsights. You need to install this plug-in on your WordPress website and follow the below steps, and you will see in no time you can add Google Analytics to your WordPress website.
Install the MonsterInsights plug-in to your WordPress.
Install this plug-in into your WordPress.
Link Google analytic’s universal account through this plug-in
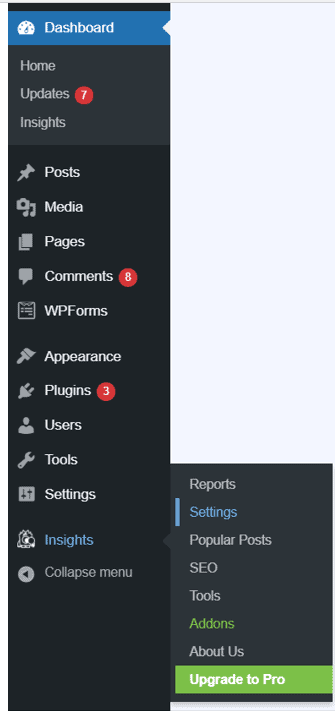
After activating the above plug-in into your WordPress, under your WordPress Dashboard, click on Click on Insights–> Setting
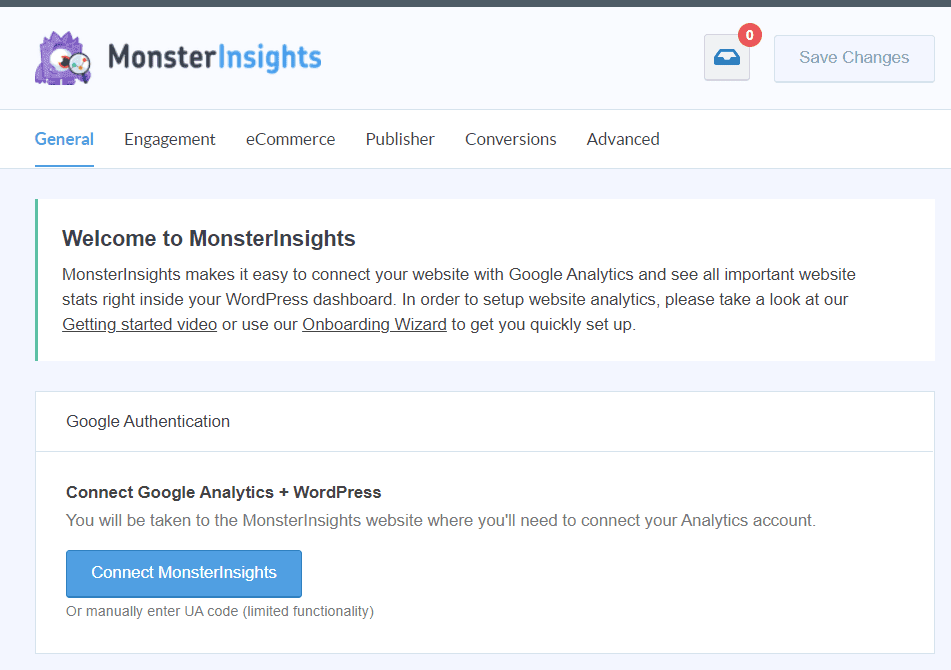
Click on Connect MonsterInsights

You have successfully added Google Analytics to your WordPress.
Within 1-2 hr, Google Analytics will start collecting the user data from your site. You can see those reports in your Google Analytics acct.
Conclusion
Both methods are easy, but if you feel any problem in pasting the code, go for installing plug-in MonsterInsights.
At least use one of the methods to track the user. Without tracking the user, you would be unable to improve your website.
In case you want to remove any Account/property from Google Analytics also you can do it easily.
That’s done. Now it is your turn to test this.